Are you tired of bland, store-bought tortilla chips? Nothing compares to the exceptional crunch and flavor of freshly made chips at home. In this comprehensive guide, you’ll discover how to create restaurant-quality tortilla chips using both traditional frying techniques and healthier baking methods. Furthermore, you’ll learn expert tips for achieving the perfect texture, flavor variations to complement any dish, and creative serving suggestions that will elevate your snacking experience.
Essential Ingredients for Creating Crispy Homemade Tortilla Chips
Before diving into the cooking process, gather these simple ingredients for tortilla chip success:
- 12 corn tortillas (6-inch size, preferably a day old)
- Cooking oil (for frying: vegetable, canola, or peanut oil; for baking: olive oil or avocado oil)
- Kosher salt or sea salt
- Optional seasonings: lime zest, chili powder, cumin, garlic powder, or tajin
Must-Have Equipment for Chip Preparation
Additionally, you’ll need these basic kitchen tools:
- For fried chips: Large, heavy-bottomed pot or deep skillet
- For baked chips: Baking sheets with rims
- Sharp knife or pizza cutter
- Paper towels
- Slotted spoon or spider strainer (for fried method)
- Cooking thermometer (highly recommended for frying)
Traditional Fried Tortilla Chip Technique
The classic approach to creating authentic tortilla chips involves frying, which delivers that unmistakable restaurant-style crunch and flavor that many chip enthusiasts prefer.
Preparing Your Tortillas for Optimal Crispness
First, prepare your tortillas properly:
- Allow your tortillas to dry slightly by leaving them out for 30 minutes, or alternatively, place them in a 200°F oven for 10 minutes.
- Stack the tortillas carefully and cut them into uniform triangles (quarters or sixths work best).
- Moreover, ensuring your tortillas are slightly dried before cooking will help them absorb less oil and become crispier.
The Perfect Oil Temperature for Golden Tortilla Chips
Subsequently, prepare your cooking oil:
- Pour 1-2 inches of oil into your pot or deep skillet.
- Heat the oil gradually to 350-375°F. Without a thermometer, you can test readiness by dropping a small piece of tortilla in—it should immediately sizzle and float to the surface.
- Maintaining consistent oil temperature throughout the frying process is crucial for evenly cooked chips.
Frying in Small Batches for Even Cooking
Now, begin the frying process:
- Carefully add a small batch of tortilla pieces to the hot oil, being cautious not to overcrowd the pan.
- Fry for approximately 1-2 minutes, gently flipping halfway through, until the chips become light golden brown and crisp.
- Using your slotted spoon or spider, transfer the chips to a paper towel-lined plate or baking sheet.
- As a result of frying in small batches, your chips will cook more evenly and become perfectly crisp.
Immediate Seasoning Technique
Timing is essential when seasoning:
- While the chips are still hot from frying, sprinkle them generously with salt and any chosen seasonings.
- Toss them gently to ensure even coating on all surfaces.
- The residual oil helps seasonings adhere properly to the warm chips.
Completing the Frying Process
Continue with the remaining tortillas:
- Repeat the frying process in small batches until all tortilla pieces are cooked.
- Allow chips to cool completely before serving or storing, as they will continue to crisp up during the cooling process.
- Consequently, your patience will be rewarded with perfectly textured chips.
Healthier Baked Tortilla Chip Method
For those seeking a lighter alternative that still delivers excellent flavor and crunch, the baking method offers a terrific option with less oil and fewer calories.
Oven Preparation and Tortilla Setup
Begin the baking process with proper preparation:
- Preheat your oven thoroughly to 375°F to ensure even cooking.
- Line baking sheets with parchment paper to prevent sticking.
- Cut tortillas into uniform triangles (quarters or sixths work well).
- Therefore, taking time for proper preparation will lead to better results.
Light Oil Application for Crispy Baked Tortilla Chips
Apply oil conservatively but effectively:
- Place tortilla pieces in a large bowl with enough space for tossing.
- Drizzle with only 1-2 tablespoons of oil—enough to lightly coat but not saturate.
- Toss gently to ensure each piece receives a thin, even coating of oil.
- In contrast to frying, this method uses significantly less oil while still achieving crispness.
Proper Spacing for Uniform Baking
Arrangement on the baking sheet matters:
- Arrange tortilla pieces in a single layer on the prepared baking sheets, ensuring no overlap.
- Space the pieces slightly apart to allow air circulation around each chip.
- This careful arrangement ensures even browning and consistent texture throughout.
Baking Time and Temperature Management
Monitor the baking process closely:
- Bake for 12-15 minutes total, but check progress at the halfway point.
- At approximately 6-7 minutes, flip each chip carefully for even browning on both sides.
- Watch closely during the final minutes, as chips can quickly progress from perfectly golden to overdone.
- Meanwhile, prepare your seasonings for immediate application after baking.
Post-Baking Seasoning Process
Season promptly after baking:
- Remove from oven and immediately sprinkle with salt and optional seasonings while still hot.
- Allow chips to cool completely on the baking sheet, where they’ll continue to crisp up.
- As a result of this timing, seasonings will adhere properly to the surface of each chip.
Expert Tips for Achieving Professional-Quality Tortilla Chips
Elevate your chip-making skills with these professional insights:
Selecting Premium Ingredients
The foundation of great chips starts with quality ingredients:
- Choose traditional corn tortillas with minimal ingredients (corn, lime, water).
- Slightly stale tortillas actually work better than super fresh ones due to lower moisture content.
- Select high-quality oils with high smoke points for better flavor and performance.
- Consequently, better ingredients lead directly to better-tasting chips.
Precision Cutting Techniques
How you cut your tortillas affects the final product:
- For consistent cooking, ensure all chips are cut to similar sizes.
- A sharp pizza cutter often works better than a knife for clean, even cuts.
- Stack only 3-4 tortillas at once when cutting to maintain control and precision.
- Therefore, taking care with this step ensures even cooking and professional appearance.
Perfect Seasoning Blends
Create signature flavor profiles with these seasoning combinations:
- Classic Lime Salt: Combine lime zest with sea salt for a bright, fresh flavor.
- Chili-Lime: Mix tajin seasoning or ancho chili powder with salt for a spicy kick.
- Garlic-Parmesan: Blend garlic powder, finely grated parmesan, and a touch of salt.
- Ranch Style: Combine dried dill, garlic powder, onion powder, and salt.
- Nevertheless, don’t be afraid to experiment with your own unique combinations.
Proper Storage Solutions
Maintain freshness with proper storage:
- Ensure chips are completely cooled before storing to prevent condensation.
- Store in an airtight container at room temperature for up to 3 days.
- If chips lose crispness, reheat in a 300°F oven for 5 minutes to restore texture.
- However, freshly made chips are always best when consumed within 24 hours.
Creative Serving Suggestions for Homemade Tortilla Chips
Your handcrafted chips deserve equally impressive pairings:
Classic Dip Pairings
Traditional companions for tortilla chips:
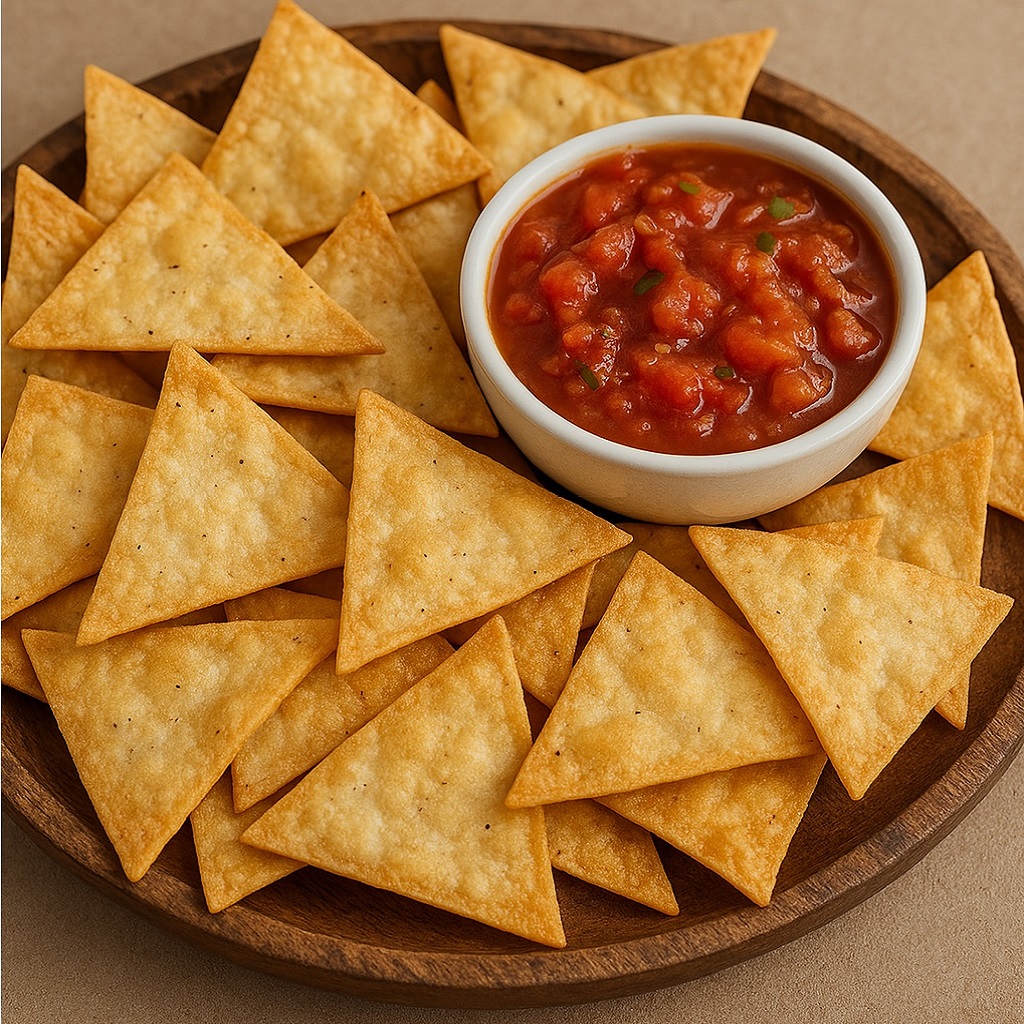
- Restaurant-Style Salsa: Blend fresh tomatoes, onions, cilantro, jalapeños, and lime juice.
- Perfect Guacamole: Mash ripe avocados with lime, salt, diced onion, and tomato.
- Queso Dip: Create a smooth cheese sauce with white American cheese, milk, and green chiles.
- Bean Dip: Blend refried beans with sour cream, cheese, and spices for a hearty option.
Elevated Nacho Presentations
Transform your chips into impressive nacho platters:
- Layer chips evenly on an oven-safe platter or sheet pan.
- Add protein like seasoned ground beef, shredded chicken, or black beans.
- Sprinkle generously with shredded cheese (a combination of cheddar and Monterey Jack works well).
- Bake at 350°F until cheese melts, about 5-7 minutes.
- Top with diced tomatoes, jalapeños, sour cream, and fresh cilantro.
- In addition, consider adding unexpected toppings like pickled red onions or roasted corn.
Breakfast Applications
Surprisingly, tortilla chips make excellent breakfast ingredients:
- Chilaquiles: Simmer slightly thicker homemade chips in salsa verde or roja until slightly softened, then top with fried eggs, queso fresco, and cilantro.
- Migas: Sauté chips with beaten eggs, onions, tomatoes, and peppers for a Tex-Mex breakfast scramble.
- Breakfast Nachos: Layer chips with scrambled eggs, chorizo, black beans, and cheese for a hearty morning meal.
Soup and Salad Enhancements
Use your chips as gourmet garnishes:
- Tortilla Soup: Float a few chips on top of chicken tortilla soup for added texture.
- Taco Salad: Crumble chips over salad greens with seasoned ground beef, beans, cheese, and avocado.
- Gazpacho Topping: Add crunch to cold gazpacho soup with a few chips around the rim of the bowl.
Troubleshooting Common Chip-Making Challenges
Even experienced cooks encounter issues when making tortilla chips. Here are solutions to common problems:
Solving Oil Temperature Problems
When chips cook unevenly:
- Too Brown/Too Fast: Your oil is likely too hot. Reduce temperature to 350°F and test with a thermometer.
- Soggy/Greasy Chips: Oil temperature is too low. Increase to 375°F to ensure quick cooking with minimal absorption.
- Uneven Browning: Stir oil between batches to maintain consistent temperature throughout.
Addressing Texture Issues
For texture problems:
- Chewy Centers: Tortillas may be too fresh and moist. Dry them longer before cooking or use older tortillas.
- Breaking During Flipping: Handle with care using a spider strainer rather than tongs.
- Curling Excessively: Make a small slit from the edge toward the center of each triangular piece before cooking.
Fixing Seasoning Difficulties
When seasonings don’t stick properly:
- Season immediately after cooking while oil is still tacky.
- For especially clingy seasonings like fine spice blends, mix them with the salt first.
- Consider using a fine-mist spray bottle with oil for baked chips to help seasonings adhere better.
Homemade tortilla chips are not just a snack; they’re a canvas for culinary creativity. From classic dips to innovative toppings, the possibilities are endless. For more inspiration, check out this comprehensive guide to making tortilla chips and serving ideas. It’s packed with tips to elevate your homemade chips into a show-stopping treat!
Health Benefits of Homemade vs. Store-Bought Tortilla Chips
Making your own chips offers several advantages beyond superior taste:
- Control over ingredients means no preservatives or artificial flavors.
- Baked chips contain significantly less fat than commercial fried versions.
- Fresh preparation provides better nutrient retention from corn tortillas.
- You can adjust sodium levels to meet dietary needs.
- Additionally, the cost savings can be substantial when making chips at home regularly.
Final Thoughts on Homemade Tortilla Chip Crafting
Creating your own tortilla chips is more than a cooking project—it’s a gateway to authentic flavors that commercial products simply can’t match. The process is straightforward yet rewarding, offering endless opportunities for personalization through different cooking methods, seasonings, and serving styles.
Once you master these techniques, you’ll discover that homemade chips elevate everything from casual snacking to elaborate entertaining. The difference in taste, texture, and freshness is remarkable and well worth the minimal effort required.
Whether you choose the traditional fried method for authentic restaurant-style results or the healthier baked approach for everyday enjoyment, your homemade tortilla chips will undoubtedly become a staple in your culinary repertoire. Furthermore, the pride of serving something made from scratch always adds an extra layer of satisfaction to any meal or gathering.
Start your homemade tortilla chip journey today, and you’ll never look at the store-bought version the same way again!
Related Posts: