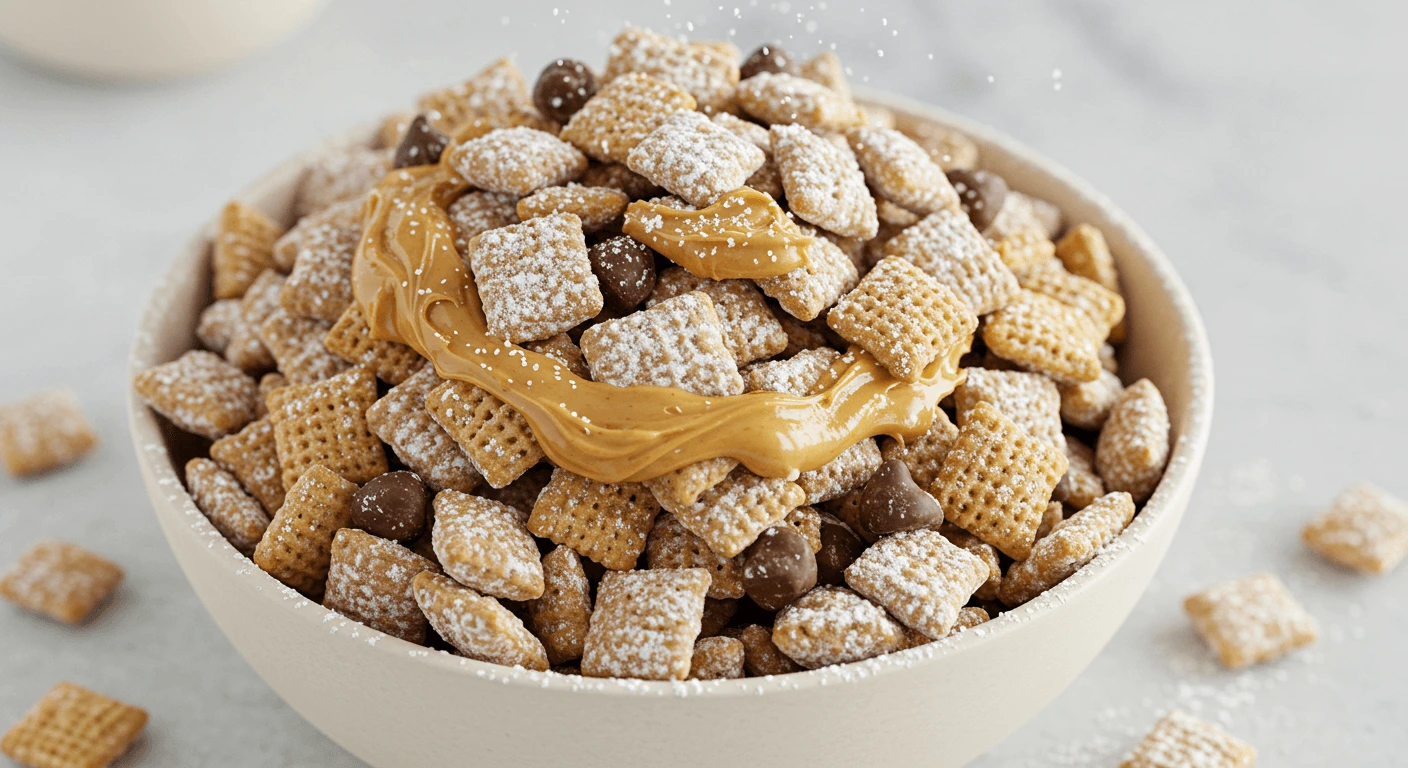
If you’re looking for a sweet, crunchy, and irresistibly addictive snack, Muddy Buddies Mix is the perfect choice! Also known as Puppy Chow, this no-bake treat combines the rich flavors of chocolate and peanut butter with the light crunch of Chex cereal, all dusted in a generous coating of powdered sugar. It’s a classic snack that’s loved by kids and adults alike, making it ideal for parties, holidays, or even an indulgent movie night at home.
In this blog post, I’ll show you how to make the best Muddy Buddies Mix with an easy-to-follow recipe and plenty of tips to help you achieve the perfect balance of flavors and textures. Whether you’re a seasoned chef or a beginner in the kitchen, this simple yet delicious recipe will quickly become a favorite in your household. Let’s dive in and whip up a batch of this irresistible treat!
What Is Muddy Buddies Mix?
Define Muddy Buddies Mix and Its Origin (Mention “Puppy Chow”)
Muddy Buddies Mix, often referred to as Puppy Chow, is a popular no-bake snack that perfectly combines sweet and savory flavors with a satisfying crunch. This iconic treat features bite-sized pieces of Chex cereal coated in a rich mixture of melted chocolate, peanut butter, and butter, which are then generously dusted with powdered sugar. The result is a sweet, crunchy snack that melts in your mouth and leaves your fingers delightfully dusted with sugar.
The name “Puppy Chow” is believed to have originated from the snack’s visual resemblance to dog food kibble, although it is, of course, entirely meant for human consumption. While the term “Muddy Buddies” is a more commonly used name today—thanks to its branding by General Mills’ Chex cereal—it remains the same beloved recipe with regional and personal variations across the United States.
Origin and Popularity
The roots of Muddy Buddies Mix can be traced back to American kitchens in the 1980s when Chex cereal recipes started becoming a hit for quick, versatile snack ideas. The combination of pantry staples like cereal, chocolate, and peanut butter made it a favorite for busy families looking for easy-to-make treats. Over the years, the recipe has become a go-to for holidays, parties, and even as a thoughtful homemade gift.
This snack’s appeal lies not just in its taste but in its versatility—there are endless ways to customize it for different flavors, themes, and occasions, making it a timeless favorite for all ages.
Highlight Its Key Ingredients Like Chex Cereal, Peanut Butter, Chocolate Chips, and Powdered Sugar
The magic of Muddy Buddies Mix lies in its simple yet perfectly balanced combination of ingredients. Each component contributes to the signature flavor and texture of this beloved snack. Let’s break down the key ingredients and what makes them essential:
Chex Cereal
At the heart of every Muddy Buddies Mix recipe is Chex cereal, known for its light and crispy texture. The cereal acts as the perfect base, absorbing the melted chocolate and peanut butter mixture while maintaining its crunch. Rice Chex and Corn Chex are the most popular choices because of their neutral flavor, but Wheat Chex can be used for those seeking a slightly nuttier taste. For gluten-free versions, Rice Chex is the go-to option, making this snack inclusive for a wide range of diets.
Peanut Butter
Peanut butter is the creamy, nutty hero of Muddy Buddies Mix. It pairs beautifully with the chocolate to create a rich, velvety coating for the cereal. The natural saltiness of peanut butter balances the sweetness of the sugar and chocolate, ensuring the snack isn’t overwhelmingly sweet. For those with allergies or dietary preferences, alternatives like almond butter, cashew butter, or sunflower seed butter can be used with great success.
Chocolate Chips
Melted chocolate chips are what give Muddy Buddies Mix its luscious, decadent flavor. Semi-sweet chocolate is commonly used to prevent the snack from becoming overly sugary, but you can experiment with milk chocolate or dark chocolate depending on your taste preferences. The melted chocolate also acts as the glue that helps the peanut butter stick to the cereal. For dairy-free options, vegan chocolate chips work just as well.
Powdered Sugar
The final step—and arguably the most fun—is coating the chocolate-covered cereal in powdered sugar. This step gives Muddy Buddies their signature snowy, sweet finish. The powdered sugar not only adds a delightful sweetness but also helps prevent the pieces from sticking together, making the mix easy to eat and share. For a unique twist, you can mix powdered sugar with a touch of cocoa powder or flavored powdered sugars to add an extra layer of flavor.
Optional Add-ins
While the classic recipe revolves around these four ingredients, the beauty of Muddy Buddies Mix is its adaptability. Many people enjoy adding mix-ins like vanilla extract for depth of flavor, a pinch of salt for contrast, or festive candies and sprinkles for a seasonal twist.
These four ingredients come together in harmony to create a snack that is not only delicious but also endlessly customizable. Whether you stick to the classic combination or experiment with new flavors, the core ingredients ensure a consistently crowd-pleasing treat!
Discuss Occasions When This Snack Is Typically Enjoyed
One of the reasons Muddy Buddies Mix is such a beloved treat is its incredible versatility—it can be enjoyed at virtually any time or occasion. Whether you’re hosting a gathering, celebrating a holiday, or simply craving a sweet and crunchy snack, this mix fits the bill perfectly. Here’s a closer look at the occasions when this no-bake treat shines the brightest:
1. Parties and Gatherings
Muddy Buddies Mix is a crowd-pleaser, making it a go-to snack for parties and social gatherings. Its bite-sized nature and easy-to-share quality make it ideal for events like:
- Birthday parties: Customize the mix with sprinkles or candies in the birthday person’s favorite colors.
- Game nights: Serve it alongside savory snacks for a sweet contrast that guests can munch on throughout the evening.
- Potlucks: Bring a big bowl of Muddy Buddies Mix to share—it’s a guaranteed hit that’s easy to prepare in large quantities.
2. Holidays and Festive Celebrations
Muddy Buddies Mix is a staple during holidays, thanks to its adaptability and festive appearance. With a few creative tweaks, it can be tailored to suit any holiday theme:
- Christmas: Add red and green candies or peppermint extract for a holiday-inspired twist.
- Halloween: Mix in orange and black candies, candy corn, or mini marshmallows shaped like ghosts.
- Easter: Use pastel-colored candies or white chocolate for a springtime vibe.
This snack also makes for a thoughtful homemade gift during the holidays. Package it in decorative bags or jars with ribbons for a personal touch.
3. Everyday Treats
Muddy Buddies Mix isn’t just for special occasions—it’s perfect for satisfying sweet cravings on any day. Whether you’re enjoying a quiet evening at home or packing a quick snack for work or school, its ease of preparation and portability make it an excellent choice.
- Movie nights: A bowl of Muddy Buddies Mix pairs perfectly with your favorite film.
- Lunchbox snack: Portion it into small containers for a fun and delicious addition to kids’ or adults’ lunches.
- Afternoon pick-me-up: A handful of this mix can provide a quick energy boost during a busy day.
4. Special Events and Milestones
From baby showers to graduations, Muddy Buddies Mix can add a sweet touch to any milestone celebration. Personalize it with themed decorations, like colored candies or edible glitter, to match the event. Its simplicity and universal appeal make it a reliable choice for any type of gathering.
Ingredients You’ll Need for the Best Muddy Buddies Mix
List Essential Ingredients (e.g., Chex Cereal, Peanut Butter, Chocolate Chips, Powdered Sugar)
The beauty of Muddy Buddies Mix lies in its simplicity. With just a handful of pantry staples, you can create a treat that’s delicious, quick to prepare, and endlessly satisfying. Let’s dive into the essential ingredients that make up this iconic snack and why each one is indispensable:
1. Chex Cereal
Chex cereal forms the foundation of Muddy Buddies Mix, providing a light, crispy texture that absorbs the rich chocolate-peanut butter coating beautifully.
- Rice Chex: The most popular choice due to its neutral flavor and gluten-free status.
- Corn Chex: A slightly sweeter option that complements the chocolate and peanut butter flavors well.
- Wheat Chex: Offers a heartier, nuttier taste for those who prefer a more robust flavor profile.
The square shape and hollow texture of Chex cereal allow it to hold the coating evenly, ensuring a perfect crunch in every bite.
2. Peanut Butter
Peanut butter is one of the star ingredients, bringing a creamy, nutty richness that balances the sweetness of the chocolate and powdered sugar.
- Smooth peanut butter is ideal for creating a uniform coating that clings to the cereal.
- For dietary restrictions, substitutes like almond butter, cashew butter, or sunflower seed butter work wonderfully without compromising flavor.
The slight saltiness of peanut butter enhances the overall flavor, giving the mix a perfect sweet-and-savory balance.
3. Chocolate Chips
Melted chocolate chips are the key to binding the ingredients together and adding a luscious, indulgent flavor.
- Semi-sweet chocolate chips are the classic choice, offering a rich flavor without overwhelming sweetness.
- For variations, try milk chocolate for extra sweetness or dark chocolate for a deeper, more intense flavor.
- Vegan or dairy-free chocolate chips can be used for those with dietary preferences.
When melted with peanut butter, the chocolate creates a smooth, velvety mixture that evenly coats the cereal pieces.
4. Powdered Sugar
Powdered sugar is the finishing touch that gives Muddy Buddies Mix its signature sweet coating and snow-like appearance.
- It adds a light sweetness that balances the richness of the chocolate and peanut butter.
- The fine texture ensures the sugar clings to each piece, preventing the coated cereal from sticking together.
- For a creative twist, consider blending the powdered sugar with flavors like cocoa powder, cinnamon, or flavored extracts to add an extra layer of taste.
5. Optional Add-Ins (Bonus Ingredients)
While the core ingredients are simple, Muddy Buddies Mix is highly adaptable, and you can enhance it with optional add-ins to suit your preferences:
- Vanilla extract: Adds a subtle depth of flavor to the chocolate-peanut butter mixture.
- Butter: Often melted with the chocolate and peanut butter to make the coating smoother and easier to work with.
- Salt: A pinch of salt can enhance the overall flavor and provide a contrast to the sweetness.
These ingredients are pantry staples for many households, making Muddy Buddies Mix an easy and accessible recipe that you can whip up anytime. With just these few essentials, you’ll have the perfect base for creating a snack that’s as fun to make as it is to eat!
Provide substitution ideas for dietary preferences (e.g., gluten-free cereal or almond butter).
One of the greatest advantages of Muddy Buddies Mix is its versatility, making it easy to adapt to different dietary preferences and restrictions. Whether you’re accommodating gluten-free, nut-free, dairy-free, or vegan diets, there are simple ingredient substitutions that still deliver the same delicious results. Here are some ideas:
1. Gluten-Free Substitutions
- Gluten-Free Chex Cereal:
The standard Rice Chex and Corn Chex varieties are naturally gluten-free, making them a perfect choice for those avoiding gluten. Ensure that the box is labeled as “certified gluten-free” to avoid cross-contamination. - Alternative Cereals:
If Chex cereal isn’t available, other gluten-free cereal options with a similar texture, such as puffed rice or gluten-free cornflakes, can work well.
2. Nut-Free Substitutions
- Sunflower Seed Butter or Soy Butter:
If someone has a peanut or tree nut allergy, sunflower seed butter or soy butter are excellent alternatives to peanut butter. Both options have a creamy texture and a mild flavor that pairs beautifully with chocolate. - Tahini:
For an adventurous twist, tahini (sesame seed paste) can be used. Its earthy flavor adds a unique dimension to the mix.
3. Dairy-Free Substitutions
- Dairy-Free Chocolate Chips:
Replace traditional chocolate chips with dairy-free or vegan varieties, such as those made by Enjoy Life or Lily’s. - Coconut Oil:
Substitute butter with coconut oil when melting the chocolate and peanut butter mixture. It adds a subtle hint of coconut flavor and works seamlessly in the recipe. - Almond Milk or Other Plant-Based Milks:
If the recipe calls for a splash of milk to loosen the mixture, use almond milk, oat milk, or soy milk instead.
4. Vegan Substitutions
- Vegan Chocolate Chips:
Opt for dairy-free chocolate chips to ensure the mix is completely vegan. - Plant-Based Butter Alternatives:
Use vegan butter or coconut oil in place of dairy-based butter. - Maple Syrup or Agave:
If a sweetener is needed to adjust flavor, both maple syrup and agave nectar are excellent vegan options.
5. Sugar-Free or Low-Sugar Substitutions
- Sugar-Free Chocolate Chips:
For those watching their sugar intake, use sugar-free or stevia-sweetened chocolate chips. - Erythritol Powder or Monk Fruit Sweetener:
Instead of powdered sugar, dust the mix with a powdered sugar alternative like erythritol powder or monk fruit sweetener.
6. Flavor and Texture Substitutions
- Nut Butter Alternatives:
Swap peanut butter with almond butter, cashew butter, or even hazelnut spread (like Nutella) for a different flavor profile. - Additional Coating Options:
Experiment with cocoa powder, cinnamon sugar, or a mix of powdered sugar and protein powder to customize the coating.
By incorporating these substitutions, you can easily adapt the classic Muddy Buddies Mix recipe to meet a variety of dietary needs without compromising taste or texture. These adjustments ensure that everyone, regardless of dietary preferences, can enjoy this sweet and crunchy snack.
Mention tools needed, like a microwave-safe bowl and an airtight container for storage.
Preparing Muddy Buddies Mix is a simple, no-bake process that doesn’t require fancy equipment, making it a great recipe for beginners and seasoned cooks alike. However, having the right tools on hand can make the preparation easier, quicker, and mess-free. Here’s a breakdown of the essential tools and how they contribute to the process:
1. Microwave-Safe Bowl
- Purpose: A large, microwave-safe bowl is crucial for melting the chocolate, peanut butter, and butter mixture. It ensures even melting and prevents scorching.
- Tips:
- Use a heat-resistant glass or ceramic bowl, as these materials distribute heat evenly.
- If you don’t have a microwave, you can substitute this with a saucepan or a double boiler for stovetop melting.
2. Mixing Spoons or Silicone Spatula
- Purpose: These tools help you mix the melted chocolate and peanut butter mixture smoothly and evenly coat the cereal.
- Tips:
- A silicone spatula works best for scraping every bit of the mixture from the bowl, minimizing waste.
- Use a sturdy spoon or spatula to gently fold the cereal into the chocolate mixture without crushing it.
3. Large Mixing Bowl
- Purpose: You’ll need a large mixing bowl to combine and coat the Chex cereal thoroughly.
- Tips:
- Choose a bowl with plenty of room to prevent spills while mixing.
- If you’re making a double batch, consider using an extra-large bowl or even a clean stockpot.
4. Resealable Plastic Bag or Large Food Storage Bag
- Purpose: Once the cereal is coated in chocolate, a resealable plastic bag is used to shake the mixture with powdered sugar, ensuring an even coating.
- Tips:
- Use a gallon-sized bag for convenience. Ensure the bag is sturdy to avoid tearing during shaking.
- Alternatively, you can use a large container with a tight lid to shake the mix.
5. Airtight Container for Storage
- Purpose: To keep your Muddy Buddies Mix fresh, an airtight container is essential. It prevents the snack from going stale and protects it from moisture.
- Tips:
- Use a clear container to easily see the snack inside.
- Divide the mix into smaller containers for portion control or gifting purposes.
6. Measuring Cups and Spoons
- Purpose: Accurate measurements ensure that the proportions of chocolate, peanut butter, powdered sugar, and cereal are balanced.
- Tips:
- Use standard measuring cups for dry and liquid ingredients to maintain consistency in your recipe.
7. Parchment Paper or Baking Sheet (Optional)
- Purpose: After coating the cereal in powdered sugar, spread it out on a baking sheet lined with parchment paper to cool and dry. This step prevents clumping and makes it easier to handle.
- Tips:
- If you don’t have parchment paper, a clean countertop or a silicone baking mat can also work.
8. Airtight Bags for Gifting
- Purpose: If you plan to share your Muddy Buddies Mix as gifts, small resealable bags or decorative treat bags are perfect for packaging.
- Tips:
- Add ribbons or stickers to make the packaging festive and personal.
By having these tools ready, you can streamline the preparation process and ensure your Muddy Buddies Mix turns out perfectly every time. With minimal equipment and a bit of creativity, this treat is as fun to make as it is to eat!
Step-by-Step Guide to Making Muddy Buddies Mix
Explain how to melt chocolate and peanut butter together (mention microwave method for ease).
One of the most critical steps in making Muddy Buddies Mix is melting the chocolate and peanut butter together to create the smooth, velvety coating that adheres to the cereal. While this step may seem simple, using the right method ensures the best texture and flavor without burning the ingredients. Here’s a detailed guide to achieving the perfect melted mixture, with the microwave method highlighted for its ease and convenience:
1. Microwave Method (Quick and Easy)
The microwave method is the fastest and most straightforward way to melt chocolate and peanut butter. Here’s how to do it:
- Step 1: Prepare Your Ingredients
- Use a large, microwave-safe bowl to accommodate the chocolate chips, peanut butter, and any optional butter or vanilla extract.
- Add the ingredients in the proper proportions, typically 1 cup of chocolate chips to ½ cup of peanut butter, with 2 tablespoons of butter for added richness and smoothness.
- Step 2: Microwave in Intervals
- Heat the mixture in the microwave on 50% power to avoid scorching the chocolate.
- Start with 30-second intervals, stirring after each interval to promote even melting and prevent overheating.
- Step 3: Stir Until Smooth
- Continue microwaving and stirring until the mixture is completely smooth and well combined.
- Be patient—overheating can cause the chocolate to seize or become grainy. If necessary, reduce the microwave time to 15-second intervals toward the end.
2. Tips for Success Using the Microwave Method
- Avoid Overheating: Chocolate burns easily, so keep an eye on the mixture and stir frequently.
- Use High-Quality Ingredients: Higher-quality chocolate chips and peanut butter result in a smoother, richer coating.
- Add Butter or Oil (Optional): Adding a small amount of butter or coconut oil can help the mixture stay silky and spread more easily over the cereal.
3. Stovetop Method (Double Boiler)
If you don’t have a microwave or prefer a more controlled approach, the stovetop method is an excellent alternative:
- Fill a saucepan with a few inches of water and bring it to a simmer.
- Place a heatproof bowl over the saucepan, ensuring the bottom of the bowl doesn’t touch the water.
- Add the chocolate chips, peanut butter, and butter to the bowl.
- Stir constantly until the mixture is melted and smooth.
This method prevents the chocolate from overheating and is ideal for those who prefer hands-on control.
4. Combining the Mixture with Cereal
Once the chocolate and peanut butter mixture is perfectly melted:
- Pour it over the Chex cereal in a large mixing bowl.
- Use a silicone spatula to gently fold the mixture, ensuring every piece of cereal is evenly coated without breaking the squares.
5. Troubleshooting Common Issues
- Chocolate Seized: If the chocolate becomes thick and grainy, add a teaspoon of vegetable oil or coconut oil to bring it back to a smooth consistency.
- Mixture Too Thick: If the melted mixture is difficult to spread, warm it slightly in the microwave or double boiler, or add a tablespoon of milk or cream to loosen it.
By following these steps, you’ll achieve a smooth, creamy mixture that forms the foundation of a delicious and perfectly coated Muddy Buddies Mix. This method is simple enough for beginners while yielding professional-quality results.
Describe coating Chex cereal evenly with the melted mixture.
Coating the Chex cereal evenly with the melted chocolate and peanut butter mixture is one of the most satisfying steps in making Muddy Buddies Mix. This process ensures that every piece of cereal is enveloped in a luscious, rich layer of flavor, forming the perfect base for the powdered sugar coating. To achieve a smooth and even coating, follow these detailed steps and tips:
1. Prepare Your Mixing Setup
- Use a Large Bowl:
- Choose a bowl big enough to hold the Chex cereal comfortably with room for mixing. This prevents the cereal from spilling out as you stir.
- Pre-Measure the Cereal:
- Measure out the required amount of Chex cereal (usually 9 cups for a standard recipe) and set it aside so you can work quickly once the mixture is ready.
2. Pour the Melted Mixture Over the Cereal
- Work in Batches:
- If you’re making a large batch, consider splitting the cereal into two bowls and dividing the melted mixture to ensure every piece gets coated evenly.
- Drizzle Gradually:
- Pour the melted chocolate-peanut butter mixture slowly over the cereal in a thin, even stream. This allows for better distribution and minimizes clumping.
3. Gently Toss the Cereal
- Use a Silicone Spatula:
- A silicone spatula or a large wooden spoon is ideal for folding the mixture without breaking the delicate Chex cereal squares.
- Folding Technique:
- Start at the edges of the bowl and gently lift and fold the cereal toward the center. Rotate the bowl as you mix to ensure even coverage.
- Avoid stirring too vigorously, as this can crush the cereal and create uneven pieces.
4. Ensure Even Coating
- Inspect for Clumps:
- Pause occasionally to check that every piece of cereal is coated with the mixture. If you notice any uncoated clusters, use the spatula to separate them and fold in more of the melted mixture.
- Add More Mixture if Necessary:
- If you have leftover melted mixture, drizzle it over the cereal and repeat the folding process.
5. Troubleshooting Uneven Coating
- Mixture Too Thick:
- If the melted mixture begins to harden or thicken, reheat it briefly in the microwave (in 15-second intervals) or over a double boiler to restore its smooth consistency.
- Crushed Cereal:
- Be gentle during mixing to prevent breaking the cereal into crumbs, which can affect the texture of the final product.
6. Alternative Coating Methods
- Use a Plastic Bag:
- For a hands-free option, place the Chex cereal in a large resealable plastic bag, pour in the melted mixture, seal the bag, and gently shake and knead the bag to coat the cereal evenly.
- Layering Method:
- Spread half the cereal on a baking sheet, drizzle half the melted mixture, and toss lightly. Repeat with the remaining cereal and mixture for thorough coverage.
7. Let the Coated Cereal Cool Slightly
- Avoid Adding Powdered Sugar Too Soon:
- Let the coated cereal cool for a minute or two before adding powdered sugar. If the mixture is too warm, the powdered sugar can melt and form a sticky mess.
Achieving an even coating ensures that every bite of Muddy Buddies Mix delivers the perfect combination of chocolate, peanut butter, and cereal crunch. With a little patience and the right techniques, this step transforms simple ingredients into a delicious, irresistible treat.
Include the process of tossing the cereal in powdered sugar for the iconic finish.
The final step in making Muddy Buddies Mix is tossing the coated Chex cereal in powdered sugar. This step not only gives the snack its iconic snowy appearance but also adds a light sweetness that balances the rich flavors of chocolate and peanut butter. Achieving an even powdered sugar coating is easy with the right tools and techniques. Here’s how to do it:
1. Prepare Your Materials
- Powdered Sugar:
- Measure the powdered sugar according to your recipe (typically 1½ to 2 cups for a standard batch) and set it aside in a bowl for easy access.
- Sift the powdered sugar if it’s clumpy to ensure a smooth, even coating.
- Resealable Plastic Bag or Large Food Storage Bag:
- Use a gallon-sized resealable bag for the easiest tossing method. Make sure the bag is sturdy to prevent splitting during shaking.
- Alternatively, you can use a large airtight container with a lid for the tossing process.
2. Add the Coated Cereal to the Bag or Container
- Work in Batches if Necessary:
- If your batch is large, divide the coated cereal into smaller portions to ensure even coverage. Overcrowding the bag or container can lead to uneven distribution of powdered sugar.
- Use Clean Hands or a Spatula:
- Transfer the chocolate and peanut butter-coated cereal into the bag or container gently to avoid breaking the cereal pieces.
3. Add the Powdered Sugar
- Sprinkle Evenly:
- Pour the powdered sugar into the bag or container over the cereal. Distribute it evenly across the surface for the best results.
- Adjust the Quantity:
- Start with about ¾ of the powdered sugar. You can add more later if needed to achieve the desired level of coating.
4. Toss and Shake
- Seal the Bag or Container:
- If using a resealable bag, press out excess air before sealing it to make shaking easier. For containers, ensure the lid is tightly secured.
- Shake Gently:
- Shake the bag or container gently but firmly, flipping it upside down and side to side to distribute the powdered sugar. This ensures that each piece of cereal is fully coated.
- If you’re using a bag, use your hands to knead and rotate the cereal inside for better coverage.
5. Check for Even Coating
- Inspect the Mix:
- Open the bag or container to check the cereal. Every piece should be covered in a light, white layer of powdered sugar.
- If some pieces are still sticky or under-coated, add more powdered sugar and shake again.
6. Troubleshooting Tips
- Clumping Issues:
- If the cereal clumps together, break apart the pieces with your hands or a spatula before adding powdered sugar. This prevents large chunks from forming during the tossing process.
- Sticky Cereal:
- Let the chocolate-coated cereal cool for 1–2 minutes before tossing it in powdered sugar. If it’s too warm, the sugar may melt and create a sticky mess.
7. Spread to Cool
- Use a Baking Sheet or Parchment Paper:
- Once the cereal is evenly coated, spread it out on a baking sheet lined with parchment paper. This allows the mix to cool completely and prevents sticking.
- Avoid Overcrowding:
- If making a large batch, use multiple sheets or work in sections to give the cereal space to cool.
8. Store the Finished Snack Properly
- Use an Airtight Container:
- Once the mix has cooled and set, transfer it to an airtight container or resealable bags for storage. This keeps the cereal fresh and crunchy.
- Prolonged Freshness:
- Store the mix in a cool, dry place, away from heat and humidity, to maintain its texture and flavor.
By carefully tossing the cereal in powdered sugar, you transform the mix into its signature sweet treat with a light, snow-dusted finish. This step is not only functional but also adds to the visual appeal and enjoyment of Muddy Buddies Mix.
Offer tips for avoiding clumps and ensuring a smooth coating.
Creating a batch of Muddy Buddies Mix with an even, clump-free coating is key to achieving the perfect texture and flavor. The process involves careful handling of both the melted mixture and the powdered sugar coating. Here are practical tips to help you avoid clumps and ensure a smooth, professional-quality finish:
1. Use Fresh and High-Quality Ingredients
- Chocolate Chips and Peanut Butter:
- Opt for smooth peanut butter instead of chunky varieties, as the latter can create an uneven melted mixture.
- Use high-quality chocolate chips that melt easily, ensuring a silky consistency.
- Powdered Sugar:
- Sift the powdered sugar before use to remove any lumps that could lead to uneven coating.
2. Melt the Mixture Correctly
- Microwave in Intervals:
- When melting chocolate and peanut butter, use short 30-second bursts in the microwave, stirring in between, to avoid overheating and creating a thick, grainy mixture.
- Double Boiler for Precision:
- If you’re concerned about overheating, melt the mixture in a double boiler for more control and a smoother texture.
- Consistency Check:
- The melted mixture should be smooth, pourable, and free of lumps before adding it to the cereal.
3. Prepare the Chex Cereal Properly
- Separate the Cereal:
- Ensure the cereal pieces are separated and not stuck together before pouring the melted mixture.
- Work in Batches if Necessary:
- If making a large batch, divide the cereal into smaller portions to make mixing easier and prevent clumping.
4. Mix Gently and Evenly
- Pour Gradually:
- Drizzle the melted mixture over the cereal in small amounts instead of pouring it all at once. This helps to distribute the coating evenly.
- Use a Gentle Folding Motion:
- Use a silicone spatula or wooden spoon to gently fold the cereal. Avoid vigorous stirring, which can crush the cereal and create clumps.
- Rotate the Bowl:
- Rotate the mixing bowl as you fold to ensure every piece of cereal is coated.
5. Handle the Powdered Sugar with Care
- Add in Portions:
- Instead of dumping all the powdered sugar at once, add it in smaller amounts and toss the cereal in between additions for more even coverage.
- Shake in a Bag or Container:
- Place the coated cereal in a large resealable bag or airtight container with the powdered sugar and shake gently. This method evenly distributes the sugar while minimizing clumping.
6. Spread the Cereal to Cool
- Use a Baking Sheet:
- After coating the cereal with the melted mixture, spread it out on a parchment-lined baking sheet to cool slightly. This prevents the pieces from sticking together.
- Separate Clumps Early:
- Check for clumps during the cooling process and gently break them apart with your hands or a spatula.
7. Monitor Temperature
- Avoid Coating While Too Warm:
- Let the melted mixture cool slightly before adding the powdered sugar. If the mixture is too hot, the powdered sugar can melt and create a sticky mess.
- Don’t Overcool:
- If the melted coating hardens too much before tossing with powdered sugar, it can cause clumping. Work quickly but efficiently.
8. Work in Small Batches
- Divide the Process:
- If you’re making a large quantity, divide the coated cereal into smaller batches for tossing with powdered sugar. Smaller portions are easier to handle and ensure even coating.
9. Use the Right Tools
- Spatula or Wooden Spoon:
- Use a flexible spatula to scrape the sides of the bowl and fold the mixture thoroughly without breaking the cereal.
- Large Mixing Bowl:
- A large bowl provides enough space for mixing and minimizes the risk of clumping.
10. Additional Tips for Perfection
- Prevent Moisture:
- Keep the work area and tools dry, as moisture can cause the powdered sugar to clump or dissolve.
- Layering Option:
- If you notice clumps forming, spread the cereal on a sheet and sprinkle powdered sugar in layers, tossing gently between each layer.
By following these tips, you’ll ensure a smooth and evenly coated batch of Muddy Buddies Mix every time. The process is simple yet rewarding, resulting in a snack that looks and tastes as amazing as it should.
Creative Variations of Muddy Buddies Mix
Suggest flavor twists like peppermint bark, s’mores, or birthday cake Muddy Buddies.
One of the best things about Muddy Buddies Mix is its versatility. While the classic chocolate and peanut butter recipe is a fan favorite, you can easily customize it to create unique flavor profiles that cater to different occasions, holidays, and personal preferences. Below are some creative flavor twists, including Peppermint Bark, S’mores, and Birthday Cake Muddy Buddies, along with tips for how to make each version:
1. Peppermint Bark Muddy Buddies
Perfect for the holiday season, this variation combines the cool, minty flavor of peppermint with rich chocolate for a festive twist.
- Ingredients:
- Replace semisweet chocolate chips with white chocolate chips or a mix of white and dark chocolate.
- Add peppermint extract (about ½ teaspoon) to the melted mixture for a minty flavor.
- Crush candy canes or peppermint candies into small pieces for garnish.
- Process:
- Melt the white chocolate with butter (and peanut butter, if desired). Add the peppermint extract.
- Toss the Chex cereal in the melted mixture until fully coated.
- Toss in powdered sugar mixed with crushed candy canes for the iconic finish.
- Serving Tip:
- Pack this version in holiday-themed tins or jars for a thoughtful and delicious gift.
2. S’mores Muddy Buddies
Capture the essence of a campfire treat with this indulgent flavor twist.
- Ingredients:
- Use milk chocolate chips instead of semisweet chocolate for a sweeter chocolate flavor.
- Add crushed graham crackers and mini marshmallows to the mix.
- Sprinkle in some toasted coconut flakes for a smoky, campfire-like touch (optional).
- Process:
- Melt the milk chocolate with butter and peanut butter. Toss the Chex cereal in this mixture.
- Add powdered sugar mixed with crushed graham crackers for the coating.
- Once coated, fold in mini marshmallows and additional graham cracker crumbs.
- Serving Tip:
- Serve this version in individual bowls with a few marshmallows toasted on top for a fun presentation.
3. Birthday Cake Muddy Buddies
This fun and colorful twist is great for birthdays, celebrations, or whenever you need a cheerful snack.
- Ingredients:
- Use white chocolate chips and add a few drops of vanilla or butter extract for a cake-like flavor.
- Include rainbow sprinkles (or seasonal sprinkles for themed events).
- Substitute powdered sugar with a mix of powdered sugar and dry cake mix (like vanilla or funfetti).
- Process:
- Melt the white chocolate with butter and mix in the vanilla or butter extract. Toss the cereal until evenly coated.
- Toss in a mixture of powdered sugar and dry cake mix for the coating.
- Stir in rainbow sprinkles after the cereal is coated and cooled to prevent melting.
- Serving Tip:
- Serve this version in colorful bowls or pack it into small treat bags tied with ribbons for party favors.
4. Other Flavor Ideas
- Cookies and Cream Muddy Buddies:
- Use white chocolate and add crushed chocolate sandwich cookies (like Oreos) to the mix. Coat the cereal in powdered sugar and cookie crumbs for a creamy, crunchy treat.
- Cinnamon Roll Muddy Buddies:
- Melt white chocolate and mix with cinnamon and a touch of cream cheese extract. Toss in powdered sugar mixed with ground cinnamon.
- Peanut Butter Lovers:
- Double up on peanut butter by using peanut butter chips alongside chocolate chips. Top with crushed peanuts for extra crunch.
Tips for Customizing Your Own Twists
- Incorporate Themed Mix-ins:
- Add holiday or occasion-specific candies, such as pastel-colored M&Ms for Easter or red and green sprinkles for Christmas.
- Experiment with Different Coatings:
- Try crushed cereal, flavored powders, or even cocoa powder as a secondary coating.
- Play with Textures:
- Include crunchy, chewy, or nutty mix-ins like pretzels, dried fruits, or chopped nuts to add variety to the texture.
- Use Extracts for Flavor Boosts:
- Vanilla, almond, coconut, or orange extracts can elevate the flavor profile with just a few drops.
By experimenting with these flavor twists, you can make Muddy Buddies Mix uniquely your own, delighting friends and family with fun and unexpected variations. These versions also make great gifts, party snacks, or themed treats for special occasions.
Discuss adding mix-ins like pretzels, M&Ms, or nuts for texture.
Adding mix-ins to your Muddy Buddies Mix is a great way to elevate the classic recipe by introducing new flavors, textures, and visual appeal. Mix-ins not only enhance the snacking experience but also allow you to customize the treat for specific occasions or preferences. Here’s how to thoughtfully incorporate ingredients like pretzels, M&Ms, or nuts into your Muddy Buddies:
1. Pretzels: Adding a Salty Crunch
Pretzels are a perfect complement to the sweetness of Muddy Buddies, offering a salty, crunchy contrast that balances the flavors.
- Why Use Pretzels?
- Their crisp texture and salty coating create a delightful balance with the sugary, chocolatey coating on the cereal.
- The unique shape of pretzel twists or sticks adds visual interest and makes the mix more fun to eat.
- How to Incorporate Pretzels:
- Break larger pretzel twists into bite-sized pieces for better distribution.
- Mix pretzels into the Muddy Buddies after the powdered sugar coating step to prevent them from getting sticky.
- Opt for flavored pretzels (e.g., garlic, ranch, or honey mustard) for a creative flavor twist.
- Pro Tip:
- Use mini pretzels for easier snacking and to ensure they blend well with the size of the Chex cereal.
2. M&Ms: Adding Sweetness and Color
M&Ms are a popular mix-in that add a burst of chocolate flavor, a satisfying crunch, and a pop of color to your Muddy Buddies.
- Why Use M&Ms?
- They enhance the chocolate flavor while adding a candy-like texture.
- Available in a variety of colors, M&Ms can be customized for holidays, parties, or themed events (e.g., red and green for Christmas or pastel shades for Easter).
- How to Incorporate M&Ms:
- Fold M&Ms into the Muddy Buddies mix once it has cooled to avoid melting the candy coating.
- Add them in moderation to prevent overpowering the other flavors.
- Experiment with specialty flavors like peanut, caramel, or pretzel-filled M&Ms for added variety.
- Pro Tip:
- Chill your mix briefly before adding M&Ms if the coating feels sticky, ensuring the candies don’t adhere too much to the cereal.
3. Nuts: Adding Protein and a Nutty Flavor
Nuts are an excellent choice for adding a rich, nutty flavor and satisfying crunch to your Muddy Buddies mix. They also introduce a dose of protein, making the snack a bit more filling.
- Why Use Nuts?
- Their natural crunch complements the cereal’s texture while adding complexity to the flavor profile.
- They pair particularly well with the peanut butter and chocolate elements of the mix.
- Best Nuts to Use:
- Peanuts: Stick with the theme of peanut butter and chocolate.
- Almonds: Add a subtle, nutty sweetness.
- Cashews: Their buttery texture and mild flavor work well in sweet snacks.
- Pecans: For a slightly richer, caramel-like note, try toasted pecans.
- How to Incorporate Nuts:
- Use raw or roasted nuts, depending on your preference. Avoid heavily salted or seasoned nuts to keep the mix balanced.
- Add nuts after coating the cereal with powdered sugar, or toss them lightly in powdered sugar for consistency.
- Toast the nuts beforehand to enhance their flavor and aroma.
- Pro Tip:
- Chop larger nuts like almonds or cashews into smaller pieces for easier blending with the cereal.
4. Combining Mix-Ins for Maximum Impact
You don’t have to stop at one type of mix-in—combining multiple add-ins can create a dynamic, crowd-pleasing snack mix.
- Ideas for Combination Mix-Ins:
- Pretzels + M&Ms: A sweet and salty duo that’s perfect for parties.
- Nuts + Dried Fruits: Create a trail mix-inspired version of Muddy Buddies.
- Pretzels + M&Ms + Nuts: The ultimate textural mix with sweet, salty, and crunchy elements.
- When to Add Mix-Ins:
- Always incorporate mix-ins after the cereal is fully coated and cooled to maintain their texture and prevent them from sticking together.
- Pro Tip:
- Balance your mix-ins by volume. For example, aim for 2 parts Muddy Buddies to 1 part mix-ins to keep the cereal as the star of the snack.
5. Storage Considerations for Mix-Ins
- Prevent Staleness:
- Store Muddy Buddies with mix-ins in an airtight container to preserve the crunchiness of pretzels and nuts.
- Layering for Delicate Ingredients:
- If using fragile mix-ins like marshmallows or candy-coated chocolates, layer them gently into the container to avoid crushing.
- Avoid Moisture:
- Keep the container in a cool, dry place, as moisture can make pretzels soggy and powdered sugar clumpy.
Adding mix-ins like pretzels, M&Ms, and nuts allows you to transform the classic Muddy Buddies Mix into a more diverse and exciting snack. These variations can be tailored to different tastes and occasions, ensuring there’s something for everyone in each bite.
Include the process of tossing the cereal in powdered sugar for the iconic finish.
The final step of making Muddy Buddies Mix—tossing the coated cereal in powdered sugar—is where the magic happens. This process gives the snack its signature look and transforms it into the sweet, snowy treat everyone loves. To achieve the perfect finish, follow these steps and tips:
1. Timing is Everything
- Coat While Warm:
- Toss the cereal in powdered sugar immediately after mixing it with the melted chocolate and peanut butter. This ensures the powdered sugar adheres properly to the slightly sticky coating.
- Avoid Cooling Too Long:
- If the coated cereal cools too much, the sugar won’t stick as effectively, resulting in uneven coverage.
2. Choose the Right Equipment
- Large Resealable Bags:
- A gallon-sized resealable plastic bag works wonders for even coating. It allows you to shake the cereal with powdered sugar without creating a mess.
- Mixing Bowls with Lids:
- If you prefer reusable options, use a large mixing bowl with a fitted lid. Simply secure the lid and shake to distribute the powdered sugar evenly.
- Sifters for Finishing Touches:
- Use a fine mesh sifter to sprinkle additional powdered sugar over the mix if needed for a more uniform appearance.
3. Step-by-Step Process
- Prepare the Sugar:
- Measure the powdered sugar based on the recipe instructions (usually 1 to 1½ cups for a standard batch).
- Sift the powdered sugar to remove any lumps, ensuring a smooth, even coating.
- Transfer the Coated Cereal:
- Once the cereal is coated in the melted mixture, transfer it into your chosen mixing container (a resealable bag or bowl).
- Work in batches if necessary, especially for large quantities, to avoid overcrowding and ensure even distribution.
- Add the Powdered Sugar:
- Pour the powdered sugar over the cereal. For a resealable bag, seal it tightly, leaving some air inside to allow room for shaking.
- If using a bowl, sprinkle the powdered sugar over the cereal, cover with the lid, and shake gently.
- Shake Gently but Thoroughly:
- Shake the container gently but vigorously enough to coat all the pieces evenly. Rotate the container or bowl as needed to prevent clumping.
- Check the mixture periodically and break apart any clumps with your hands or a spatula.
- Adjust Coating:
- If some pieces appear undercoated, add more powdered sugar and repeat the shaking process. The cereal should have a consistent white, powdered look.
4. Spread and Cool
- Avoid Clumping During Cooling:
- After tossing the cereal, spread it out on a parchment-lined baking sheet or tray to cool completely. This step helps prevent clumping and ensures the cereal pieces remain separate.
- Break Apart Any Clumps:
- Use your fingers or a spatula to gently separate any clusters that may have formed during the tossing process.
5. Add a Decorative Touch
- Double-Coat for Extra Sweetness:
- For a more indulgent finish, toss the cooled cereal in a second light layer of powdered sugar.
- Garnish Options:
- Sprinkle additional powdered sugar just before serving to enhance the snowy, festive appearance.
6. Storage Tips
- Airtight Containers:
- Once the cereal is completely cooled, store it in an airtight container to preserve the coating and keep the cereal fresh.
- Layering for Large Batches:
- If storing in layers, separate each layer with parchment paper to prevent the pieces from sticking together.
Tossing the cereal in powdered sugar is not just about the taste; it’s also what gives Muddy Buddies Mix its iconic, dessert-like appearance. By following these steps and tips, you can ensure your mix looks flawless and tastes irresistibly sweet.
Offer tips for avoiding clumps and ensuring a smooth coating.
Achieving a smooth, even coating is essential for perfect Muddy Buddies Mix, both in terms of taste and texture. Clumps can lead to uneven flavors and an unappealing appearance, so it’s worth taking a little extra care during the preparation process. Here are some practical tips to help you avoid clumps and ensure every piece of cereal is beautifully coated:
1. Melt the Chocolate and Peanut Butter Properly
A smooth melted mixture is the foundation for even coating.
- Use a Microwave Method for Convenience:
- Combine chocolate chips, peanut butter, and butter in a microwave-safe bowl. Heat in 20-30 second intervals, stirring well between each interval to prevent overheating and ensure the mixture is silky smooth.
- Avoid overcooking, as overheated chocolate can become grainy and lumpy, making it harder to coat the cereal evenly.
- Opt for a Double Boiler for Precision:
- If you’re worried about overheating, use a double boiler to melt the ingredients gently. Stir constantly to maintain a smooth texture.
- Check for Consistency:
- The melted mixture should be thick but pourable. If it’s too thick, add a small amount of vegetable oil or coconut oil to loosen it up.
2. Coat the Cereal Gradually
Adding the melted mixture to the cereal in stages helps prevent clumps.
- Use a Large Mixing Bowl:
- Choose a bowl that’s big enough to allow plenty of space for stirring without the cereal spilling over.
- Add the Mixture Slowly:
- Pour the melted chocolate and peanut butter mixture over the cereal in small batches. Toss the cereal gently between additions to ensure even distribution.
- Use Gentle Folding Motions:
- Avoid stirring aggressively, as this can crush the cereal and create uneven coating. Instead, use a silicone spatula or your hands (wearing food-safe gloves) to gently fold the cereal until fully coated.
3. Prevent Powdered Sugar Clumps
Powdered sugar is notorious for forming clumps if not handled correctly.
- Sift the Powdered Sugar:
- Before tossing the cereal, sift the powdered sugar through a fine mesh sieve to remove any lumps. This ensures a smooth, even coating.
- Work in Small Batches:
- Toss the cereal with powdered sugar in smaller portions to give each piece the best chance of being evenly coated.
4. Shake, Don’t Stir
Shaking is the most effective method for achieving an even powdered sugar coating.
- Use a Large Resealable Bag:
- Place the coated cereal in a gallon-sized resealable plastic bag. Add the powdered sugar, seal the bag with some air inside, and shake gently but thoroughly to coat every piece.
- Shake in Multiple Directions:
- Rotate the bag while shaking to ensure all sides of the cereal are evenly dusted.
- Check Frequently:
- Open the bag periodically to check for clumps and break them apart with your fingers if necessary.
5. Spread and Cool Immediately
Clumping often occurs when the cereal isn’t spread out properly to cool.
- Use Parchment Paper or a Non-Stick Surface:
- After coating, spread the cereal out on a parchment-lined baking sheet or a large tray to cool. This prevents pieces from sticking together.
- Separate Clumps While Cooling:
- If you notice clumps forming during cooling, gently break them apart with your hands or a spatula while the mixture is still slightly warm.
6. Adjust Ratios if Needed
The correct ratio of melted mixture to cereal is critical for avoiding sticky clumps.
- Don’t Overload the Cereal:
- Too much melted mixture can cause clumping and make it harder to coat the cereal evenly. Stick to the recipe’s recommended measurements, or slightly reduce the amount of melted mixture for a drier finish.
- Balance Powdered Sugar:
- Adding too much powdered sugar at once can create clumps. Add it gradually, tossing or shaking between additions.
7. Use the Right Tools
Having the correct tools on hand makes a big difference in preventing clumps.
- Silicone Spatulas:
- Flexible spatulas are ideal for folding the melted mixture into the cereal without crushing it.
- Wide, Shallow Bowls:
- These allow for easier mixing and reduce the risk of uneven coating or clumping.
- Sifters and Sieves:
- Ensure powdered sugar is smooth and lump-free before tossing.
8. Avoid Excess Moisture
Moisture can lead to clumping by causing the powdered sugar to stick together.
- Dry Ingredients Thoroughly:
- Ensure the cereal is completely dry before starting. Moist cereal can lead to uneven coating and clumps.
- Store in a Dry Place:
- Keep Muddy Buddies away from humid environments to maintain their light, crisp coating.
By following these tips, you can avoid clumps and achieve the smooth, evenly coated Muddy Buddies that everyone loves. Whether you’re making a classic batch or experimenting with flavor twists, these techniques will ensure your snack looks and tastes fantastic every time.
Creative Variations of Muddy Buddies Mix
Suggest flavor twists like peppermint bark, s’mores, or birthday cake Muddy Buddies.
One of the best things about Muddy Buddies Mix is how versatile it is. While the classic combination of chocolate, peanut butter, and powdered sugar is undeniably delicious, adding unique flavor twists can elevate the mix for specific occasions, holidays, or personal preferences. Below are creative suggestions for three popular flavor variations: Peppermint Bark, S’mores, and Birthday Cake.
1. Peppermint Bark Muddy Buddies
Perfect for the holiday season, this twist combines the cool, refreshing flavor of peppermint with the richness of chocolate for a festive treat.
- How to Make It:
- Chocolate Base: Use white chocolate or a mix of white and dark chocolate for the melted coating.
- Peppermint Flavor: Add a few drops of peppermint extract to the melted mixture. Be cautious, as peppermint extract is potent—start with a small amount and adjust to taste.
- Mix-Ins: Crush candy canes or peppermint candies into small pieces and mix them in after coating the cereal.
- Finishing Touch: Sprinkle additional crushed candy canes over the powdered sugar-coated mix for a decorative touch.
- When to Serve:
- Great for Christmas parties, holiday gift bags, or winter-themed events.
2. S’mores Muddy Buddies
This variation channels the classic campfire treat, combining the flavors of graham crackers, marshmallows, and chocolate.
- How to Make It:
- Chocolate Base: Stick with classic milk chocolate for the melted coating to mimic the taste of melted s’mores chocolate.
- Graham Cracker Flavor: Add finely crushed graham cracker crumbs to the powdered sugar before tossing the cereal. This gives the mix a subtle graham cracker taste.
- Mix-Ins: Fold in mini marshmallows and broken graham cracker pieces after coating the cereal.
- Optional Touch: Drizzle some melted chocolate over the finished mix and sprinkle with additional graham cracker crumbs for extra flavor and texture.
- When to Serve:
- Ideal for summer gatherings, camping trips, or as a nostalgic treat at any time of year.
3. Birthday Cake Muddy Buddies
This playful and colorful twist is perfect for celebrations. The sweet vanilla flavor and rainbow sprinkles make it a festive choice for birthdays or parties.
- How to Make It:
- Chocolate Base: Use white chocolate or vanilla-flavored candy melts for the coating.
- Cake Batter Flavor: Mix in a few tablespoons of dry yellow or white cake mix with the powdered sugar for an authentic birthday cake taste. Ensure the cake mix is heat-treated to make it safe to eat raw.
- Mix-Ins: Stir in rainbow sprinkles or edible glitter after coating the cereal. For an extra celebratory touch, add mini white chocolate chips or chunks of frosted animal crackers.
- Optional Drizzle: Once the mix is done, drizzle it with more melted white chocolate and top with additional sprinkles.
- When to Serve:
- Perfect for birthday parties, kids’ events, or any occasion that calls for a fun and colorful snack.
Customizing Your Flavor Twists
- Experiment with Extracts:
- Add extracts like almond, coconut, or orange to the melted chocolate to create custom flavors. For example, an almond extract pairs beautifully with white chocolate for a marzipan-inspired twist.
- Play with Mix-Ins:
- Incorporate unique ingredients like toffee bits, freeze-dried fruit, or flavored baking chips to create your own flavor profiles.
- Adapt to the Season:
- Use seasonal candies or flavors to tie the mix to specific holidays. For example, pastel-colored M&Ms for Easter, pumpkin spice seasoning for fall, or red-and-green sprinkles for Christmas.
- Control Sweetness:
- If you prefer a less sweet snack, try using dark chocolate or adding a pinch of sea salt to balance the flavors.
Serving and Storing Flavor Twists
- Presentation Matters:
- Serve your flavored Muddy Buddies in themed bowls or gift bags that match the occasion.
- Storage Tips:
- Store each variation in an airtight container to preserve the distinct flavors. Avoid mixing different flavors in the same container to prevent them from blending.
These flavor twists not only keep Muddy Buddies Mix exciting but also make it an adaptable treat for every occasion. Whether you’re planning a holiday party, a summer bonfire, or a birthday celebration, these variations are sure to impress your guests!
Discuss adding mix-ins like pretzels, M&Ms, or nuts for texture.
Adding mix-ins to your Muddy Buddies Mix is an easy and creative way to enhance its texture, flavor, and visual appeal. These additions can transform the classic recipe into a more dynamic and personalized snack mix that caters to a variety of preferences. Here’s how you can incorporate mix-ins like pretzels, M&Ms, or nuts to elevate your Muddy Buddies:
1. Pretzels: A Salty Crunch
- Why Pretzels Work:
- Pretzels add a satisfying salty crunch that contrasts beautifully with the sweetness of the powdered sugar and chocolate coating. The combination of salty and sweet creates a balanced flavor profile that keeps people coming back for more.
- How to Add Them:
- Use mini pretzels, pretzel sticks, or pretzel nuggets. Their small size blends well with the cereal for a harmonious mix.
- Add the pretzels after the cereal has been coated in powdered sugar and cooled to maintain their crisp texture.
- Creative Variations:
- Try chocolate-covered or yogurt-covered pretzels for an extra indulgent touch.
2. M&Ms: A Pop of Color and Sweetness
- Why M&Ms Work:
- M&Ms provide bursts of chocolate flavor and a vibrant pop of color, making the mix more visually appealing and festive. They’re perfect for tailoring the mix to specific holidays or events by using seasonal M&M varieties (e.g., red and green for Christmas, pastel for Easter).
- How to Add Them:
- Stir in M&Ms after the cereal has cooled completely. Adding them too soon can cause the candy coating to melt and lose its shiny finish.
- Use mini M&Ms for a more uniform texture, or regular-sized ones for a chunkier mix.
- Creative Variations:
- Experiment with specialty M&Ms, such as peanut, pretzel, or caramel-filled, for extra layers of flavor and texture.
3. Nuts: A Nutty Depth of Flavor
- Why Nuts Work:
- Nuts add a toasty, nutty flavor and a satisfying crunch that complements the creamy peanut butter and chocolate coating. They’re also a great way to introduce some protein and healthy fats into the mix.
- How to Add Them:
- Choose a variety of nuts like almonds, peanuts, pecans, or cashews.
- Toast the nuts lightly before adding them to enhance their flavor and crunch.
- Add the nuts after the cereal has been coated and cooled to prevent them from becoming overly sticky.
- Creative Variations:
- Use candied nuts for a sweet and crunchy twist, or spiced nuts for a hint of heat or savory flavor.
4. Other Mix-In Ideas for Texture
- Mini Marshmallows:
- Add a soft, chewy element that pairs well with the crunchy cereal. Great for S’mores-inspired Muddy Buddies.
- Toffee Bits:
- Provide a buttery crunch that adds a caramel-like sweetness to the mix.
- Dried Fruits:
- Incorporate dried cranberries, raisins, or chopped dried apricots for a chewy, fruity contrast to the chocolatey base.
- Popcorn:
- Air-popped popcorn adds a light, airy texture and is a fun addition for movie nights.
- Shredded Coconut:
- Toasted or sweetened coconut flakes add a tropical flair and a unique chewy texture.
5. Tips for Adding Mix-Ins
- Balance the Ratios:
- Avoid overcrowding the mix with too many add-ins, as this can overshadow the Muddy Buddies themselves. A good rule of thumb is to aim for about 1 to 2 cups of mix-ins per standard batch.
- Add After Coating:
- Always add mix-ins after the cereal has been coated in powdered sugar and cooled. This ensures the mix-ins maintain their original texture and don’t get sticky or soggy.
- Match the Theme:
- Tailor your mix-ins to match the occasion. For example, use red and pink M&Ms with heart-shaped pretzels for Valentine’s Day or candy corn for Halloween.
- Consider Allergies:
- If serving to a crowd, be mindful of common allergens like nuts. Provide alternatives such as seeds (e.g., sunflower or pumpkin seeds) or allergen-free candies.
6. Storing Mix-Ins for Freshness
- Separate When Necessary:
- If you’re preparing the mix ahead of time, consider storing certain mix-ins (like marshmallows or pretzels) separately to prevent them from losing their texture. Combine them just before serving.
- Use Airtight Containers:
- To maintain freshness, store your Muddy Buddies with mix-ins in an airtight container at room temperature.
Adding mix-ins like pretzels, M&Ms, or nuts can turn a classic batch of Muddy Buddies into a personalized snack mix tailored to any occasion. By experimenting with textures and flavors, you can create endless variations that cater to your preferences and delight your guests.
Mention Seasonal Themes (e.g., Red and Green Candies for Christmas)
One of the most exciting aspects of Muddy Buddies Mix is its adaptability to various holidays and celebrations. By incorporating seasonal themes into the recipe, you can make this treat even more festive and visually appealing. Adding a touch of holiday spirit with themed ingredients or decorations makes it a perfect snack for parties, gift-giving, or just enjoying the season’s cheer. Here’s how to customize Muddy Buddies for different times of the year:
1. Christmas: Red and Green Festivities
The holiday season is all about bright, festive colors and comforting flavors, making Muddy Buddies a wonderful addition to any Christmas gathering.
- Themed Ingredients:
- Use red and green M&Ms or other candy-coated chocolates to match the holiday palette.
- Sprinkle in crushed peppermint candies or candy canes for a wintery twist.
- Add white chocolate drizzles and top with edible glitter or snowflake-shaped sprinkles for a frosty finish.
- Flavor Twists:
- Incorporate seasonal spices like cinnamon or nutmeg for a warm, cozy flavor.
- Add white chocolate peppermint bark chunks for an extra indulgent touch.
- Presentation:
- Serve in holiday-themed bowls or bag the mix in clear treat bags tied with red and green ribbons for easy gifting.
2. Halloween: Spooky and Sweet
Transform your Muddy Buddies into a spooky snack with a Halloween theme.
- Themed Ingredients:
- Use orange and black candy-coated chocolates or Halloween-themed candies.
- Mix in candy corn for a seasonal flair.
- Add edible candy eyes to give the mix a playful, creepy vibe.
- Flavor Twists:
- Incorporate dark chocolate for a rich, slightly bittersweet taste.
- Dust the mix with a small amount of cocoa powder along with the powdered sugar for a spooky, darkened look.
- Presentation:
- Serve in a black or orange bowl, or package in spider-web-printed treat bags for party favors.
3. Valentine’s Day: Love and Sweetness
Celebrate love with a sweet and romantic twist on the classic Muddy Buddies.
- Themed Ingredients:
- Use red, pink, and white M&Ms or heart-shaped candies.
- Add edible glitter or heart-shaped sprinkles for an extra romantic touch.
- Mix in dried strawberries or freeze-dried raspberries for a burst of color and flavor.
- Flavor Twists:
- Use white chocolate and add a drop of strawberry or raspberry extract to the melted mixture for a fruity, festive twist.
- Incorporate mini white chocolate chips or chunks for added sweetness.
- Presentation:
- Package in heart-themed gift boxes or clear treat bags tied with pink and red ribbons to share with loved ones.
4. Easter: Pastels and Spring Cheer
Bright, pastel colors and cheerful flavors make Muddy Buddies a delightful treat for Easter.
- Themed Ingredients:
- Use pastel-colored M&Ms or candy-coated chocolates.
- Add mini marshmallows and pastel-colored sprinkles for a soft, springtime feel.
- Mix in shredded coconut dyed with food coloring to resemble Easter grass.
- Flavor Twists:
- Add a touch of lemon or orange zest to the melted mixture for a fresh, citrusy twist.
- Use white chocolate for a lighter, creamy flavor that complements the pastel theme.
- Presentation:
- Serve in decorative Easter baskets or package in egg-shaped treat containers for a fun touch.
5. Fourth of July: Red, White, and Blue Celebration
Celebrate Independence Day with a patriotic version of Muddy Buddies.
- Themed Ingredients:
- Use red, white, and blue candies like M&Ms or star-shaped sprinkles.
- Add mini pretzels or white chocolate-covered pretzels for a crunchy, salty element.
- Flavor Twists:
- Use white chocolate and add a few drops of vanilla or almond extract for a simple, classic flavor.
- Presentation:
- Serve in star-shaped bowls or package in clear treat bags tied with red and blue ribbons.
6. Seasonal Flexibility
For other holidays or themes:
- St. Patrick’s Day: Use green candies and add a pinch of matcha powder for a unique, earthy flavor.
- Fall/Thanksgiving: Incorporate pumpkin spice seasoning into the powdered sugar and add orange and brown candies for an autumnal touch.
- New Year’s Eve: Add edible gold or silver glitter for a glamorous, celebratory vibe.
Tips for Success with Seasonal Themes
- Match Colors and Flavors: Use candies, sprinkles, and other mix-ins that align with the holiday’s color palette and traditional flavors.
- Adapt the Base Recipe: Experiment with different chocolates or coatings (e.g., white chocolate, dark chocolate) to match the theme.
- Creative Packaging: Presentation matters—use holiday-specific bowls, bags, or containers to make your Muddy Buddies feel extra special.
By incorporating seasonal themes, you can make Muddy Buddies Mix a year-round favorite that adds joy and flavor to any celebration. Whether it’s a winter wonderland or a summer picnic, there’s a perfect way to customize this classic snack for every occasion!
Storage Tips and Serving Ideas
How to Store Muddy Buddies Mix in an Airtight Container to Keep It Fresh
Proper storage is essential for maintaining the delicious taste and texture of your Muddy Buddies Mix. This snack can lose its crunchiness or absorb moisture from the air if not stored correctly. Here’s a comprehensive guide to ensure your Muddy Buddies stay fresh and irresistible for as long as possible.
1. Importance of Using an Airtight Container
- Keeps Out Moisture:
- Moisture can make the cereal soggy, which diminishes the delightful crunch that defines Muddy Buddies. Airtight containers prevent humidity from seeping in.
- Preserves Freshness:
- Sealing your Muddy Buddies in an airtight container helps lock in the flavors and ensures the powdered sugar coating doesn’t clump or dissolve.
- Protects Against Odors:
- An airtight seal prevents the mix from absorbing strong odors from other foods in your pantry or fridge.
2. Selecting the Right Storage Container
- Material Options:
- Use BPA-free plastic or glass containers with tightly sealing lids.
- Resealable plastic bags are also a convenient and space-saving option, especially for portioning.
- Size Matters:
- Choose a container that fits the quantity of your Muddy Buddies without leaving too much empty space. Excess air can lead to staleness.
- Reusable Options:
- Opt for reusable, eco-friendly containers or bags to reduce waste while keeping your snack fresh.
3. Preparation Before Storing
- Cool Completely:
- Ensure the Muddy Buddies are fully cooled after mixing and coating. Storing them while still warm can create condensation, leading to soggy cereal.
- Shake Off Excess Powdered Sugar:
- Gently shake the Muddy Buddies in a colander or over parchment paper to remove any loose powdered sugar. This prevents the mix from becoming overly sticky during storage.
4. Storage Tips for Maximum Freshness
- Room Temperature:
- Store your Muddy Buddies at room temperature in a cool, dry place away from direct sunlight. A pantry or cupboard works well.
- When stored correctly, the mix typically stays fresh for up to 7–10 days.
- Refrigeration:
- If your kitchen is particularly humid or warm, consider refrigerating the Muddy Buddies. Use an airtight container to prevent the powdered sugar from clumping due to the moisture in the fridge.
- Note that refrigerating may slightly alter the texture, but it helps extend the shelf life by a few days.
- Freezing for Longer Storage:
- For longer storage, freeze the mix in an airtight container or resealable freezer bag.
- Label the bag with the date to keep track of its freshness. Frozen Muddy Buddies can last up to 2 months.
- To serve, let the mix thaw at room temperature for about 30 minutes before enjoying.
5. Portioning for Convenience
- Single-Serve Bags:
- Divide the Muddy Buddies into individual portions and store them in resealable snack-size bags. This is perfect for grab-and-go snacks or portion control.
- Batch Storage:
- If storing a large batch, layer the Muddy Buddies with parchment paper in the container to prevent them from sticking together.
6. Avoiding Common Storage Mistakes
- Don’t Store While Warm:
- Always ensure the mix is completely cool to avoid creating condensation, which can lead to sogginess.
- Avoid Overpacking the Container:
- Overpacking can crush the cereal, reducing the enjoyable texture. Leave a little room for the mix to “breathe” without compromising freshness.
- Keep Away from Strong Smells:
- Store your Muddy Buddies away from pungent foods like onions or garlic, as they can absorb odors even in airtight containers.
7. Storing Flavored or Themed Variations
- Seasonal Add-Ins:
- If your Muddy Buddies include chocolate pieces, candy, or other add-ins, ensure they are also stored in the airtight container to prevent them from melting or becoming stale.
- Layering for Delicate Add-Ins:
- For fragile toppings like sprinkles or marshmallows, layer them on top to avoid them being crushed by heavier ingredients.
Proper storage is a simple yet crucial step to enjoy your Muddy Buddies Mix at its best. By using the right containers and following these tips, you’ll keep this irresistible snack fresh, flavorful, and crunchy for every occasion. Whether you’re preparing ahead for a party or saving some for later, these storage practices will ensure every bite is as delicious as the first.
Offer Serving Suggestions (e.g., in Decorative Bowls for Parties or as Gift Bags)
Muddy Buddies Mix isn’t just a treat; it’s an experience! The way you serve this sweet snack can elevate its appeal, making it a perfect addition to any occasion. Whether you’re hosting a party, creating thoughtful gifts, or simply indulging at home, there are countless creative ways to present your Muddy Buddies. Below are some serving ideas to suit every scenario.
1. Party-Ready Presentation
For gatherings or events, Muddy Buddies Mix can be a show-stopping snack with the right presentation.
- Decorative Bowls:
- Use themed bowls that match the occasion (e.g., festive red and green bowls for Christmas, pastel dishes for Easter, or spooky black bowls for Halloween).
- Layer the mix with other colorful treats like M&Ms, marshmallows, or sprinkles for a vibrant display.
- Serving Scoops:
- Provide small scoops or tongs so guests can easily serve themselves without touching the mix. This is especially handy for larger parties.
- Snack Stations:
- Set up a DIY snack bar where Muddy Buddies are the centerpiece. Surround the mix with optional add-ins like pretzels, nuts, and candies so guests can customize their own servings.
2. Individual Portions for Convenience
Offering pre-portioned servings makes it easy for guests to grab and enjoy without creating a mess.
- Cupcake Liners or Paper Cups:
- Fill festive cupcake liners or small paper cups with individual portions of Muddy Buddies. Choose designs that match your event theme for added charm.
- Mason Jars:
- Serve the mix in mini mason jars with lids. Tie a ribbon or attach a small tag for an elegant, reusable serving option.
- This is a great idea for outdoor events or picnics where spill-proof containers are a must.
- Snack Bags:
- Use clear treat bags to portion out servings. Seal the bags with twist ties or ribbons, and consider adding a label or sticker for a personalized touch.
3. Creative Gift-Giving Ideas
Muddy Buddies make an excellent homemade gift that’s thoughtful and budget-friendly.
- Holiday-Themed Bags:
- Fill treat bags with Muddy Buddies and tie them with festive ribbons. Use bags printed with seasonal patterns (e.g., snowflakes for winter or hearts for Valentine’s Day).
- Custom Tags:
- Add a handwritten or printed tag with a sweet message, the recipe, or storage instructions. Tags can be shaped like snowflakes, pumpkins, or stars to match the theme.
- Decorative Boxes:
- Package the mix in decorative tins or small gift boxes lined with wax paper. These make excellent gifts for teachers, coworkers, or neighbors.
4. Everyday Snacking at Home
Even when it’s not a special occasion, how you serve Muddy Buddies can add a bit of flair to your day.
- Movie Night Bowls:
- Serve Muddy Buddies in large, shared bowls for family movie nights. Add mix-ins like popcorn or candy to create a sweet-and-salty movie snack blend.
- After-School Snack Cups:
- Portion the mix into small bowls or cups for a quick and easy treat for kids after school.
- Ice Cream Topping:
- Sprinkle Muddy Buddies over a bowl of vanilla or chocolate ice cream for a decadent dessert.
5. Seasonal and Themed Presentations
Tailoring the serving style to the season or theme can make the mix even more special.
- Christmas Presentation:
- Serve in a large, clear glass bowl adorned with candy canes or pine garlands around the base. Add a scoop for self-service.
- Alternatively, use snowman-shaped containers or Santa-themed tins for a whimsical touch.
- Halloween Presentation:
- Present the mix in a cauldron-shaped bowl for a spooky vibe. Add gummy worms or candy eyes to the mix for extra fun.
- Valentine’s Day Presentation:
- Use heart-shaped bowls or red and pink serving dishes. Sprinkle heart-shaped candies on top for a romantic flair.
- Easter Presentation:
- Place the mix in colorful Easter baskets or egg-shaped bowls. Garnish with pastel candies or mini marshmallows for a springtime look.
6. Tips for Serving
- Freshness First:
- Always store the mix in an airtight container until just before serving to maintain freshness and crunch.
- Temperature Considerations:
- If the mix contains chocolate-based add-ins, keep it out of direct sunlight or warm areas to avoid melting.
- Accessibility:
- Place the mix in an easily accessible spot, like the center of a snack table or buffet line, so guests can help themselves.
By experimenting with these creative serving suggestions, you can turn Muddy Buddies Mix into a delightful centerpiece for any occasion. Whether it’s a party, a thoughtful gift, or a simple treat at home, the right presentation adds an extra layer of charm and enjoyment to this beloved snack.
How Long It Lasts and Whether It Can Be Frozen for Future Use
One of the best things about Muddy Buddies Mix is its versatility—not only in flavors and mix-ins but also in its ability to stay fresh and enjoyable for days or even weeks if stored properly. Whether you’re preparing ahead for a party, making a large batch for holiday gifts, or simply saving some for yourself, understanding its shelf life and freezing options will help you maximize its deliciousness.
1. How Long Does Muddy Buddies Mix Last?
The shelf life of Muddy Buddies Mix depends on how it is stored. Here’s a breakdown of what you can expect:
- Room Temperature:
- When stored in an airtight container in a cool, dry place, Muddy Buddies can last for 7 to 10 days. This is ideal for enjoying fresh and crunchy snacks throughout the week.
- Ensure the mix is kept away from direct sunlight, heat, or humidity to prevent the cereal from becoming soggy or stale.
- Refrigeration:
- Storing Muddy Buddies in the refrigerator can extend their shelf life to about 2 weeks.
- While the refrigerator helps preserve freshness, the colder temperature may slightly alter the texture, especially if the mix contains chocolate or delicate add-ins.
- Signs of Staleness:
- If the mix starts losing its crunch or the powdered sugar begins to clump excessively, it may be time to discard it. A stale or off smell is another indicator that the mix is no longer fresh.
2. Can Muddy Buddies Mix Be Frozen?
Yes, Muddy Buddies Mix can be frozen for future use! This is especially useful if you’ve made a large batch or want to prepare it ahead of time for a special occasion.
- Freezing Guidelines:
- Choose the Right Container: Use a freezer-safe airtight container or resealable freezer bags to store the mix. Ensure as much air as possible is removed from the bag to prevent freezer burn.
- Divide into Portions: If you plan to enjoy the mix in smaller servings, portion it into individual bags or containers before freezing. This makes it easy to grab just what you need without defrosting the entire batch.
- Label the Container: Add the date of freezing to the bag or container so you can keep track of how long it’s been stored.
- How Long Can It Be Frozen?
- Muddy Buddies Mix can be frozen for up to 2 months without significant loss of quality. Beyond this time, the texture of the cereal may begin to degrade, and the powdered sugar may lose its vibrant appearance.
3. How to Thaw Frozen Muddy Buddies Mix
Thawing your frozen Muddy Buddies is quick and easy:
- Room Temperature Thawing:
- Remove the mix from the freezer and let it sit at room temperature for about 30–60 minutes.
- Keep the mix sealed in its container during thawing to prevent it from absorbing moisture from the air, which can cause sogginess.
- Shake It Up:
- After thawing, gently shake or stir the mix to redistribute the powdered sugar coating. This will help restore its original texture and appearance.
- Enjoy Immediately:
- Once thawed, consume the mix within a few days to enjoy the best texture and flavor. Avoid refreezing, as this can further degrade the quality.
4. Considerations for Freezing Variations and Mix-Ins
If your Muddy Buddies Mix includes additional ingredients like chocolate candies, nuts, or marshmallows, keep these points in mind:
- Chocolate Candies:
- Freezing works well for M&Ms or similar candies, but they may develop a slight white coating (chocolate bloom) after freezing. This doesn’t affect taste but can alter appearance.
- Nuts:
- Nuts freeze well, but their texture might soften slightly over time.
- Toasting them lightly after thawing can revive their crunch if needed.
- Marshmallows:
- Marshmallows can harden in the freezer and may not regain their original texture after thawing. If you plan to freeze your mix, consider adding marshmallows fresh after thawing.
5. Practical Tips for Long-Term Storage
- Avoid Moisture:
- Whether storing at room temperature or freezing, keep the mix dry. Moisture is the biggest threat to its crunchiness and shelf life.
- Batch Preparation:
- If you plan to serve Muddy Buddies for multiple occasions, divide the mix into smaller portions and store them separately. This minimizes exposure to air and ensures each batch tastes as fresh as the first.
- Holiday Prep:
- Freezing Muddy Buddies is a fantastic way to prepare in advance for holidays or parties. Simply thaw and serve, freeing up time for other event preparations.
By following these storage and freezing tips, you can ensure your Muddy Buddies Mix stays fresh and delicious, no matter when you decide to enjoy it. Whether served fresh or prepared ahead of time, this snack will always be a crowd-pleaser!
Conclusion
Making the perfect Muddy Buddies Mix is as enjoyable as it is rewarding. With its irresistible combination of crunchy Chex cereal, creamy peanut butter, melted chocolate, and a generous dusting of powdered sugar, this snack never fails to delight. Whether you’re preparing it for a holiday celebration, a cozy movie night, or as a thoughtful homemade gift, Muddy Buddies are a versatile treat that can be tailored to any occasion.
By following the tips and variations shared in this guide—like ensuring an even coating, avoiding clumps, and experimenting with fun flavors or mix-ins—you can create a batch that truly stands out. Storing it properly ensures its freshness for days, and freezing it allows you to enjoy this delicious snack at your convenience.
Now that you know how to make the best Muddy Buddies Mix, it’s time to grab your ingredients, get creative, and whip up a batch of this beloved treat. Share it with friends and family or savor it yourself—either way, you’re guaranteed to spread joy with every crunchy bite!