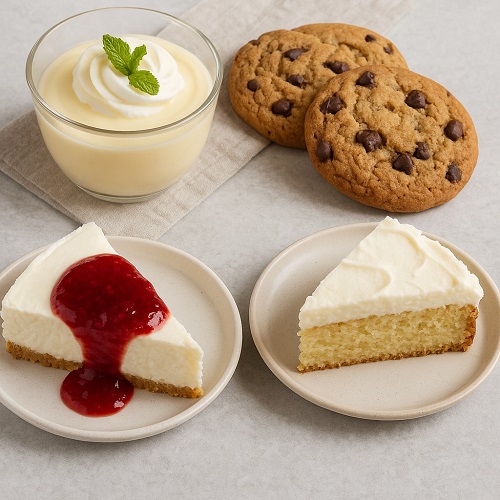
Who doesn’t love a delicious dessert? From rich chocolate treats to light fruity delights, desserts bring joy to every occasion. For beginners, though, making desserts can feel overwhelming.
This guide is here to help! “Desserts Made Simple: A Beginner’s Guide to Sweet Success” makes dessert-making easy and enjoyable. Whether you’re baking for the first time or looking for simple recipes, this guide will get you started.
You’ll learn to create mouthwatering desserts with straightforward instructions and basic ingredients. By the end, you’ll feel confident in your ability to make sweet treats without stress.
Let’s dive in and turn your kitchen into a dessert paradise!
Why Desserts Are Perfect for Beginners
Desserts That Use Simple Ingredients
Making desserts doesn’t have to mean shopping for fancy or expensive items. Many beginner-friendly recipes rely on ingredients you already have at home. Staples like flour, sugar, eggs, and butter can create a variety of sweet treats.
For example, cookies and cakes often use just a handful of pantry essentials. Adding chocolate chips or vanilla extract elevates these simple recipes into something special. Plus, these ingredients are budget-friendly and widely available.
Transitioning into desserts with minimal ingredients can build confidence for beginners. Starting small ensures success and helps you enjoy the process. By sticking to these basics, you’ll discover how easy creating desserts can be.
Here are a few beginner-friendly dessert recipes that use simple ingredients you likely already have at home:
1. Classic Sugar Cookies
Ingredients: Flour, sugar, butter, eggs, vanilla extract, and a pinch of salt.
These cookies are a timeless favorite. Mix the ingredients, roll out the dough, and bake for a soft, buttery treat.
2. Chocolate Mug Cake
Ingredients: Flour, sugar, cocoa powder, milk, oil, and baking powder.
This single-serving dessert comes together in minutes. Mix the ingredients in a mug and microwave for a quick chocolate fix.
3. Peanut Butter Cookies
Ingredients: Peanut butter, sugar, and an egg.
These three-ingredient cookies are as simple as they are delicious. Just combine the ingredients, shape the dough, and bake.
4. Banana Pancakes
Ingredients: Bananas, eggs, and a pinch of cinnamon.
Mash the bananas, mix in the eggs, and cook them like pancakes. They’re perfect for a sweet yet healthy dessert.
5. Rice Krispie Treats
Ingredients: Marshmallows, butter, and Rice Krispies cereal.
Melt the butter and marshmallows, stir in the cereal, and press the mixture into a pan. Let it set, then cut into squares.
Each of these recipes uses everyday ingredients and requires minimal effort. Which one would you like to try first?
Quick and Easy Desserts for Busy Schedules
Finding time to create desserts can feel challenging on a hectic day. However, quick and easy desserts can simplify the process. With minimal preparation and straightforward steps, you can enjoy a sweet treat without spending hours in the kitchen.
Many of these desserts use ingredients that require little or no cooking. For example, no-bake cheesecakes or fruit parfaits come together in just minutes. By skipping lengthy baking times, you can indulge in something delicious even on a tight schedule.
Additionally, one-bowl recipes like brownies or cookies minimize cleanup, making dessert-making more convenient. Combining speed and simplicity ensures you can whip up a treat anytime.
With these time-saving ideas, creating desserts becomes effortless. You’ll spend less time cooking and more time enjoying the results.
Here are a few quick and easy dessert recipes perfect for busy schedules:
1. No-Bake Cheesecake Cups
Ingredients: Cream cheese, sugar, whipped cream, and graham crackers.
Mix the cream cheese and sugar until smooth, then fold in whipped cream. Layer the mixture with crushed graham crackers in cups. Top with fruit or chocolate for a finishing touch.
2. Chocolate-Dipped Strawberries
Ingredients: Strawberries and melted chocolate.
Wash and dry the strawberries, then dip them into melted chocolate. Let them set on parchment paper for a quick, elegant dessert.
3. Instant Pudding Parfaits
Ingredients: Instant pudding mix, milk, and crushed cookies.
Prepare the pudding according to the package instructions. Layer it in glasses with crushed cookies or granola for a delightful parfait.
4. Microwave Brownie in a Mug
Ingredients: Flour, sugar, cocoa powder, milk, oil, and a pinch of salt.
Mix everything in a mug, then microwave for about one minute. Enjoy your warm, gooey brownie straight from the mug.
5. Yogurt and Fruit Popsicles
Ingredients: Yogurt, honey, and fresh fruit.
Blend the yogurt with honey, then mix in chopped fruit. Pour the mixture into popsicle molds and freeze for a refreshing treat.
Each recipe is designed to save time without compromising on taste.
Here’s a detailed step-by-step guide for making No-Bake Cheesecake Cups:
No-Bake Cheesecake Cups
Ingredients:
- 8 ounces cream cheese (softened)
- 1/3 cup granulated sugar
- 1 cup whipped cream or whipped topping
- 1 cup graham cracker crumbs
- 2 tablespoons melted butter
- Optional toppings: fresh fruit, chocolate shavings, or caramel sauce
Instructions:
- Prepare the Crust
- In a small bowl, combine the graham cracker crumbs and melted butter. Mix until the crumbs are evenly coated.
- Spoon a layer of the crumb mixture into the bottom of small cups or dessert glasses. Press down gently to form a crust.
- Make the Cheesecake Filling
- In a mixing bowl, beat the softened cream cheese and sugar together until smooth and creamy.
- Gently fold in the whipped cream or whipped topping until well combined. This creates a light and fluffy texture.
- Assemble the Cheesecake Cups
- Spoon the cheesecake filling over the graham cracker crust in each cup. Fill the cups about three-quarters full, leaving room for toppings.
- Smooth the top of the filling with the back of a spoon or a spatula.
- Add Toppings
- Top each cheesecake cup with your choice of fresh fruit, chocolate shavings, or a drizzle of caramel sauce.
- Get creative with combinations like strawberries and chocolate or blueberries and lemon zest.
- Chill and Serve
- Refrigerate the cheesecake cups for at least 1–2 hours to let them firm up.
- Serve chilled and enjoy a creamy, delicious dessert that requires no baking!
These no-bake cheesecake cups are a quick and easy dessert that tastes indulgent without the hassle.
Here’s a detailed step-by-step guide for making Chocolate-Dipped Strawberries:
Chocolate-Dipped Strawberries
Ingredients:
- 1 pint fresh strawberries (washed and dried completely)
- 1 cup semi-sweet or dark chocolate chips
- 1 teaspoon coconut oil or butter (optional, for a shinier finish)
Instructions:
- Prepare the Strawberries
- Ensure the strawberries are washed and dried thoroughly. Any water on the surface will prevent the chocolate from adhering properly.
- Leave the green tops on for easy dipping and an attractive presentation.
- Melt the Chocolate
- Place the chocolate chips in a microwave-safe bowl.
- Add 1 teaspoon of coconut oil or butter for smoother, shinier chocolate (optional).
- Microwave the chocolate in 20-second intervals, stirring after each interval, until completely melted and smooth. This prevents overheating or burning the chocolate.
- Dip the Strawberries
- Hold each strawberry by its green top and dip it into the melted chocolate.
- Swirl the strawberry gently to coat it evenly, then let the excess chocolate drip off.
- Place the dipped strawberries on a parchment-lined baking sheet.
- Add Toppings (Optional)
- For variety, sprinkle chopped nuts, shredded coconut, or colorful sprinkles onto the chocolate before it sets. This adds texture and flavor.
- Chill and Serve
- Refrigerate the dipped strawberries for about 30 minutes to allow the chocolate to harden.
- Serve immediately after chilling or store them in the refrigerator for up to 24 hours.
This quick dessert is elegant, easy to make, and perfect for any occasion. Enjoy your delicious, chocolate-dipped strawberries!
Here’s a detailed step-by-step guide for making Instant Pudding Parfaits:
Instant Pudding Parfaits
Ingredients:
- 1 box of instant pudding mix (chocolate, vanilla, or your preferred flavor)
- 2 cups of cold milk
- 1 cup crushed cookies (Oreos, graham crackers, or any favorite cookie)
- Optional toppings: whipped cream, chocolate chips, or fruit
Instructions:
- Prepare the Pudding
- In a medium-sized bowl, whisk together the instant pudding mix and cold milk.
- Follow the instructions on the pudding box, usually whisking for about 2 minutes until it thickens.
- Let the pudding sit for a few minutes to set properly.
- Layer the Parfaits
- In clear glasses or dessert cups, start by adding a layer of pudding at the bottom.
- Next, add a layer of crushed cookies. This adds a crunchy texture to balance the creamy pudding.
- Repeat the layers, alternating between pudding and crushed cookies, until the glass is filled.
- Add Toppings
- For extra flavor, top the parfaits with whipped cream, a sprinkle of chocolate chips, or fresh fruit like berries.
- You can also drizzle a bit of chocolate or caramel sauce for extra indulgence.
- Chill and Serve
- Refrigerate the parfaits for at least 30 minutes before serving to let the layers set.
- Serve chilled for a refreshing, easy-to-make dessert.
This quick and easy dessert is perfect for busy schedules. You can customize it with your favorite flavors and toppings. Enjoy a delicious, no-bake treat in just a few simple steps!
Here’s a detailed step-by-step guide for making a Microwave Brownie in a Mug:
Microwave Brownie in a Mug
Ingredients:
- 4 tablespoons all-purpose flour
- 4 tablespoons sugar
- 2 tablespoons cocoa powder
- 3 tablespoons milk
- 2 tablespoons vegetable oil
- 1/4 teaspoon vanilla extract
- Pinch of salt
Instructions:
- Mix Dry Ingredients
- In a microwave-safe mug, combine the flour, sugar, cocoa powder, and salt. Stir them together to ensure everything is evenly distributed.
- Add Wet Ingredients
- Add the milk, vegetable oil, and vanilla extract to the mug. Stir until the mixture is smooth, making sure there are no lumps.
- Microwave the Brownie
- Microwave the mug on high for 1 minute and 20 seconds. Cooking time may vary depending on the microwave’s power, so check the brownie after 1 minute. It should be set but still soft in the center.
- Let It Cool Slightly
- Allow the brownie to cool for a minute or two before eating. This helps it firm up a little and makes it easier to enjoy.
- Serve and Enjoy
- For extra indulgence, top the brownie with a scoop of ice cream, whipped cream, or chocolate syrup. Enjoy your warm, gooey treat straight from the mug!
This microwave brownie is the perfect quick dessert for busy schedules. It’s easy to make and satisfies your chocolate cravings in just a few minutes.
Here’s a detailed step-by-step guide to making Yogurt and Fruit Popsicles:
Yogurt and Fruit Popsicles
Ingredients:
- 2 cups plain or flavored yogurt
- 2–3 tablespoons honey (adjust to taste)
- 1 cup fresh fruit (e.g., berries, mango, or banana), chopped
Instructions:
- Prepare the Mixture
- In a bowl, combine the yogurt and honey. Stir well until fully blended.
- Taste the mixture and adjust the sweetness if needed by adding more honey.
- Add the Fruit
- Chop the fruit into small pieces to ensure even distribution in the popsicles.
- Gently fold the chopped fruit into the yogurt mixture. For a marble effect, swirl the fruit into the yogurt instead of mixing completely.
- Fill the Molds
- Pour the yogurt and fruit mixture into popsicle molds. Leave a little space at the top to allow for expansion during freezing.
- If you don’t have molds, small paper cups or ice cube trays can work as substitutes. Insert popsicle sticks into the center of each mold or cup.
- Freeze the Popsicles
- Place the molds in the freezer and let them freeze for at least 4–6 hours, or until completely solid.
- Unmold and Serve
- To remove the popsicles, run the molds under warm water for a few seconds. This loosens the popsicles without melting them.
- Serve immediately and enjoy your refreshing dessert!
These popsicles are perfect for busy schedules since they require minimal effort. Plus, they are a healthy and customizable option for any time of year.
No-Bake Desserts: Sweet Treats Without the Oven
No-bake desserts are a lifesaver when you want something sweet but don’t have time for baking. These treats are perfect for beginners because they require minimal equipment and no oven. By following simple steps, you can create a delicious dessert in no time.
One of the best parts of no-bake desserts is their versatility. Recipes like no-bake cheesecakes, pudding parfaits, and chocolate truffles use basic ingredients and deliver maximum flavor. Additionally, these options are ideal for warm days when you’d rather not heat up the kitchen.
No-bake desserts also save time, making them great for last-minute gatherings or busy schedules. Whether you’re craving something creamy, fruity, or chocolatey, there’s a no-bake dessert for every occasion.
Ready to explore a world of sweet treats without the oven?
Here are some simple and delightful no-bake dessert recipes:
1. No-Bake Oreo Cheesecake
Ingredients: Cream cheese, powdered sugar, whipped cream, crushed Oreos, and a store-bought Oreo crust.
- Mix the cream cheese and powdered sugar until smooth. Fold in whipped cream and crushed Oreos.
- Spread the mixture into the Oreo crust and refrigerate for at least 2 hours.
2. Chocolate Peanut Butter Bars
Ingredients: Graham cracker crumbs, melted butter, peanut butter, powdered sugar, and melted chocolate.
- Combine the graham cracker crumbs, peanut butter, and powdered sugar into a smooth mixture.
- Press into a pan, top with melted chocolate, and refrigerate until firm.
3. Lemon Icebox Pie
Ingredients: Sweetened condensed milk, fresh lemon juice, whipped cream, and a graham cracker crust.
- Whisk the condensed milk with lemon juice until it thickens. Fold in whipped cream.
- Pour the mixture into the crust and chill until set.
4. No-Bake Chocolate Truffles
Ingredients: Dark chocolate, heavy cream, and cocoa powder.
- Heat the cream and pour it over chopped chocolate. Stir until smooth, then chill until firm.
- Roll the mixture into balls and coat with cocoa powder or sprinkles.
5. Fruit and Yogurt Parfaits
Ingredients: Greek yogurt, honey, granola, and fresh fruit.
- Layer yogurt, honey, granola, and fruit in a glass. Repeat layers until the glass is filled.
Each of these no-bake desserts is easy to prepare and doesn’t require an oven.
Essential Tools for Making Desserts Easily
Must-Have Kitchen Tools for Dessert Recipes
Creating desserts becomes much easier when you have the right tools at your fingertips. The proper equipment ensures consistent results and makes the process more enjoyable. Whether you’re making simple desserts or more complex creations, these must-have kitchen tools will set you up for sweet success.
A good mixing bowl is one of the most versatile tools in any kitchen. From whisking batters to mixing fillings, this essential item simplifies your prep work. Pairing it with a sturdy whisk or a hand mixer allows you to achieve the ideal texture for various dessert recipes.
For accurate measurements, a set of measuring cups and spoons is indispensable. Baking, in particular, requires precise measurements to ensure your desserts turn out perfectly every time. Transitioning from guesswork to exact amounts can significantly improve your results.
Silicone spatulas and scrapers are invaluable for no-bake desserts and other recipes. They make it easy to mix ingredients thoroughly and scrape every last bit of batter from your bowl. Plus, they’re heat-resistant and easy to clean.
Lastly, don’t underestimate the value of a reliable baking dish or pan, even for no-bake recipes. It provides the structure needed for layered desserts like cheesecakes and bars. With these tools, creating delicious dessert recipes will feel like a breeze!
Beginner Baking Tips for Sweet Success
Starting your baking journey can feel overwhelming, but following a few key tips ensures a smooth and enjoyable experience. Learning these foundational techniques helps you avoid common mistakes while mastering the art of dessert recipes.
Read the Recipe Thoroughly
Before you begin, read the entire recipe from start to finish. This step prevents surprises during the process and ensures you have all the necessary ingredients and tools on hand.
Measure Ingredients Accurately
Baking is a science, so precise measurements are crucial. Use measuring cups for dry ingredients and a liquid measuring cup for wet ones. Transitioning from estimating to exact measurements can significantly improve your results.
Preheat Your Oven and Prepare Pans
Always preheat your oven before baking. This ensures even cooking and prevents underbaked centers. Grease or line your baking pans as instructed in the recipe to ensure easy removal of your dessert.
Use Room Temperature Ingredients
Many dessert recipes call for room-temperature butter, eggs, or milk. These ingredients mix more evenly and create a smoother batter. Take them out of the fridge 30 minutes before starting.
Don’t Overmix or Undermix
Mix the ingredients until just combined. Overmixing can lead to dense, tough textures, while undermixing may cause uneven baking. Transitioning to a folding technique for delicate batters, such as in cakes or muffins, prevents overmixing.
Invest in Quality Bakeware
Using good-quality baking pans and tools ensures even heat distribution and professional results. This investment pays off as your baking skills grow.
By following these beginner baking tips, you’ll gain confidence in the kitchen and achieve sweet success with your dessert recipes. Are you ready to try these tips in action?
Using Minimal Equipment for Quick Desserts
Creating quick desserts doesn’t always require an elaborate setup or specialized tools. With minimal equipment, you can still whip up delicious dessert recipes. Focusing on simplicity allows you to save time while satisfying your sweet cravings.
Mixing Bowls and a Whisk
A basic mixing bowl and a sturdy whisk are sufficient for most quick desserts. Use these tools to combine ingredients for recipes like mousse, pudding, or no-bake cheesecakes. Transitioning from electric mixers to manual options can save cleanup time.
Measuring Cups and Spoons
Accurate measurements are key to any successful dessert recipe. Invest in a reliable set of measuring cups and spoons to ensure consistency. With these tools, you can confidently portion ingredients for everything from mug cakes to parfaits.
A Microwave or Stovetop
Many quick dessert recipes rely on a microwave or stovetop instead of an oven. For example, you can melt chocolate, make custards, or create mug cakes in minutes. These appliances are perfect for those who want fast results without compromising flavor.
Spatula or Wooden Spoon
A silicone spatula or wooden spoon works wonders for mixing batters or folding whipped cream into fillings. Additionally, they’re excellent for scraping bowls to minimize waste. Transitioning to multipurpose tools reduces clutter in your kitchen.
Small Cups or Jars for Serving
Quick desserts often involve individual portions. Use small cups, glasses, or jars to layer parfaits, puddings, or fruit-based treats. These containers not only make serving easier but also elevate presentation.
By using minimal equipment, you can prepare quick, delicious desserts with minimal fuss. Whether you’re a beginner or in a rush, these essentials are all you need to create satisfying treats. Ready to try these tips with your favorite dessert recipes? Let me know which ones you’d like to explore!
Beginner-Friendly Dessert Recipes to Try
Classic Desserts Made Easy
Classic desserts hold a timeless appeal and are loved by people of all ages. By simplifying their preparation, you can recreate these beloved dessert recipes without stress. These approachable methods ensure that anyone, regardless of experience, can enjoy making these treats at home.
Apple Pie with a Shortcut Crust
Apple pie is a dessert recipe staple, but making it from scratch can feel daunting. Instead, use a pre-made pie crust to save time. Combine sliced apples, sugar, cinnamon, and a touch of flour, then bake until golden. This simple approach delivers the comforting flavors of a classic apple pie with minimal effort.
Vanilla Panna Cotta for Beginners
This elegant Italian dessert might seem intimidating, but it’s surprisingly easy to make. Mix cream, sugar, and vanilla with gelatin, then chill until set. Transitioning from stovetop to fridge is all it takes to prepare this silky-smooth classic dessert.
Chocolate Chip Cookies with a Twist
Nothing beats the warm, gooey goodness of freshly baked chocolate chip cookies. Use an easy, no-chill dough recipe to reduce prep time. Adding a sprinkle of sea salt on top before baking enhances the flavor, making this classic dessert recipe even more irresistible.
Rice Pudding with Pantry Ingredients
Rice pudding is a nostalgic treat that requires just a few simple ingredients. Cook rice with milk, sugar, and a touch of vanilla until creamy. Add raisins or a sprinkle of cinnamon for extra warmth and flavor. This dessert recipe transforms pantry staples into a classic favorite.
No-Fuss Crème Brûlée
Crème brûlée is a classic dessert often associated with fine dining, but it’s surprisingly easy to prepare at home. Whisk egg yolks with sugar and cream, bake in ramekins, and finish with a caramelized sugar topping. With a blowtorch or oven broiler, you can achieve the perfect crunch.
These simplified methods make classic desserts more accessible, allowing you to enjoy traditional favorites with ease. Are you ready to start your journey into these timeless dessert recipes?
Easy No-Bake Desserts for First-Timers
No-bake desserts are the perfect starting point for those new to the kitchen. These recipes require minimal effort and no oven. They deliver delicious results, making them an excellent way to build confidence in preparing dessert recipes.
No-Bake Cheesecake Cups
This creamy dessert is a favorite among beginners. Combine softened cream cheese, sugar, and whipped cream for a luscious filling. Layer the mixture over a graham cracker crust in individual cups, and top with fresh fruit or chocolate shavings. Refrigerate for a few hours, and your no-bake cheesecake dessert is ready to impress.
Chocolate Oatmeal No-Bake Cookies
These cookies are quick, easy, and packed with flavor. Mix rolled oats, peanut butter, cocoa powder, and melted butter in a bowl. Form the mixture into small cookie shapes, then chill until firm. Transitioning from mixing to shaping is simple, making it ideal for first-timers.
Fruit and Yogurt Parfaits
Parfaits are as simple as they are delicious. Alternate layers of Greek yogurt, honey, granola, and fresh fruit in a clear glass. This no-bake dessert recipe offers endless variations, allowing you to customize it to your taste.
No-Bake Peanut Butter Bars
Peanut butter bars are a beginner-friendly dessert that requires just a few steps. Combine peanut butter, powdered sugar, and graham cracker crumbs. Press the mixture into a pan, top with melted chocolate, and refrigerate until set. This dessert is rich, indulgent, and effortless to prepare.
Instant Chocolate Mousse
Chocolate mousse feels fancy but is surprisingly easy to make. Whisk heavy cream and melted chocolate until light and fluffy. Spoon the mousse into serving glasses, then chill before serving. This no-bake dessert is a great confidence booster for first-timers.
These easy no-bake desserts provide a fantastic introduction to creating sweet treats. They’re simple, satisfying, and perfect for anyone taking their first steps into dessert recipes. Which one are you most excited to try?
Quick Desserts with Few Ingredients
When time is short, and your pantry is nearly bare, quick desserts with few ingredients can save the day. These recipes rely on simple, readily available components, making them perfect for busy schedules or impromptu cravings. They’re proof that you don’t need an extensive ingredient list to create delicious dessert recipes.
Three-Ingredient Chocolate Fudge
This quick dessert requires only chocolate chips, sweetened condensed milk, and vanilla extract. Melt the chocolate with the milk over low heat, stirring until smooth. Pour the mixture into a lined pan, refrigerate until firm, and enjoy a rich, decadent treat.
Banana Ice Cream
Transform ripe bananas into a creamy dessert with just one main ingredient. Freeze sliced bananas, then blend them until smooth and creamy. For added flavor, mix in a touch of vanilla extract or cocoa powder. This dessert recipe is quick, healthy, and incredibly satisfying.
Peanut Butter Mug Cake
Craving cake but short on time? Combine peanut butter, sugar, an egg, and a pinch of baking powder in a mug. Microwave for about a minute, and you’ll have a warm, fluffy cake ready to enjoy. Transitioning from mix to microwave takes less than five minutes.
Nutella Crepes
With just eggs, flour, milk, and Nutella, you can whip up delightful crepes. Blend the batter until smooth, cook thin layers in a skillet, and fill them with Nutella. This quick dessert recipe is perfect for a simple yet indulgent treat.
Honey and Yogurt Bowl
This effortless dessert combines Greek yogurt, a drizzle of honey, and a handful of nuts or fruit. Layering these ingredients creates a visually appealing and nutritious dessert. It’s quick to prepare, making it ideal for busy evenings.
Quick desserts with few ingredients show that simplicity can lead to outstanding results. These dessert recipes are easy to follow, delicious, and perfect for beginners or those in a hurry. Which of these quick treats will you try first?
Troubleshooting Common Dessert Mistakes
Avoiding Overmixing in Dessert Recipes
Overmixing is a common pitfall in baking and dessert preparation. It can negatively affect the texture and taste of your dessert recipes. Understanding why it happens and how to prevent it ensures consistent results and perfectly executed treats.
Why Overmixing Happens
Overmixing often occurs when ingredients are stirred excessively or at the wrong stage of preparation. This mistake frequently arises during the mixing of batters for cakes, cookies, or muffins. Transitioning from careful mixing to overzealous stirring can quickly lead to dense, tough textures instead of light, airy results.
The Impact of Overmixing
Mixing develops gluten in flour-based dessert recipes, which is desirable for bread but not for most desserts. Overmixing creates excess gluten, leading to baked goods that feel chewy or rubbery. Additionally, it can deflate air bubbles in batters, causing cakes to lose their fluffiness.
Tips to Avoid Overmixing
- Follow the Recipe: Always stick to the recipe’s instructions for mixing times. Overestimating the importance of thorough mixing often leads to problems.
- Mix Just Until Combined: When adding dry ingredients to wet ones, stir only until no streaks of flour remain. Transitioning to a folding technique with a spatula can help achieve this.
- Use Gentle Motions: Avoid vigorous stirring or beating when dealing with delicate batters. Gentle, deliberate motions preserve the texture and integrity of your dessert recipe.
- Separate Wet and Dry Ingredients First: Combine wet ingredients in one bowl and dry ingredients in another. This method simplifies mixing and reduces the chance of overmixing.
Common Recipes Where Overmixing Matters
Certain dessert recipes are more sensitive to overmixing than others. Muffins, pancakes, cakes, and quick breads require extra care during preparation. Following these tips ensures these recipes turn out light, moist, and tender.
By avoiding overmixing, you can elevate the quality of your dessert recipes and consistently achieve sweet success. Which dessert would you like to perfect next?
How to Fix Common Baking Mistakes
Even experienced bakers face mishaps in the kitchen. However, knowing how to fix common baking mistakes can help salvage your dessert recipes. Below are some tips to help you avoid and correct common issues in your baking process.
Overbaked or Dry Desserts
Overbaking is a common mistake that results in dry, crumbly desserts. To fix this, keep an eye on the baking time and use a timer. If your cake or cookies turn out dry, brush them with sugar syrup or add a dollop of whipped cream to bring moisture back. Additionally, consider using recipes that include higher moisture ingredients, such as oil instead of butter.
Flat or Dense Cakes
If your cake turns out flat or dense, the issue might be with your leavening agents or overmixing. Check that you’ve measured your baking powder or soda correctly, and avoid overmixing the batter. To fix dense cakes, you can cut them into layers and fill with whipped cream or frosting. Using smaller pans can also help your cake rise evenly and bake correctly.
Cookies Spread Too Much
Cookies that spread excessively can be frustrating. This usually happens when the dough is too soft or there’s too much butter. To fix this, chill the cookie dough before baking. Also, use parchment paper or a silicone mat to help your cookies maintain their shape. Next time, try adding a bit more flour to the dough for better structure.
Burnt Edges
Burnt edges often occur when your oven temperature is too high or when the pan is too thin. To avoid this mistake, use thicker baking pans that distribute heat more evenly. If your dessert does burn, trim off the burnt edges and cover with frosting or a glaze. A lower temperature in the oven will help reduce this issue next time.
Undercooked Centers
Undercooked centers can be caused by uneven heat distribution in the oven. To fix this, return the dessert to the oven and bake at a lower temperature until the center is fully cooked. For cookies, reduce the size of the dough balls to ensure they cook evenly throughout. In some cases, covering the dessert with foil can help prevent further browning while it finishes cooking.
Lumpy Batters
Lumps in batters are often caused by either insufficient mixing or cold ingredients. To fix this, mix the batter gently and thoroughly before baking. You can also sift the dry ingredients to ensure an even mixture. If your ingredients are cold, let them come to room temperature before mixing.
Tips for Perfectly Chilled No-Bake Desserts
No-bake desserts are the perfect solution when you want to make sweet treats without turning on the oven. However, ensuring they’re perfectly chilled is key to achieving the right texture. Here are some tips that will help you create flawless, perfectly chilled no-bake desserts every time.
Choose the Right Setting Ingredients
The first step to creating perfectly chilled no-bake desserts is choosing the right ingredients that set well in the refrigerator. Ingredients like gelatin, cream cheese, or whipped cream work best for providing structure. Without the right setting agents, your dessert may turn out runny instead of firm.
Ensure Adequate Chilling Time
Chilling is essential for setting no-bake desserts, so don’t rush the process. It’s best to allow your dessert to chill for at least four hours, but overnight is often even better. When desserts don’t set properly due to insufficient chilling time, they can be soft and unstable. Therefore, plan ahead and allow plenty of time for them to firm up.
Cover and Protect During Chilling
While chilling, it’s crucial to prevent your no-bake desserts from drying out or absorbing unwanted smells from the refrigerator. Cover your dessert tightly with plastic wrap or store it in an airtight container. This protects the texture and ensures your dessert stays fresh and delicious until it’s ready to serve.
Use Proper Molds or Containers
The containers or molds you choose can have a significant impact on the finished product. Silicone molds are a great choice for easy removal, while glass dishes offer a clear view of your layered desserts. Choose the appropriate size and shape for your dessert and make sure it has enough space for even chilling.
Test Before Serving
Before serving your chilled no-bake dessert, gently test its consistency. The surface should feel firm, but slightly springy. If it still feels soft, give it additional chilling time. It’s important to be patient and not serve until the dessert has properly set.
Avoid Overcrowding the Refrigerator
An overcrowded refrigerator can slow down the chilling process and affect the consistency of your desserts. To avoid this, leave space around your dessert for airflow. This ensures your no-bake treat chills evenly and sets properly.
Even the most experienced bakers encounter dessert mishaps—soggy crusts, cracked cheesecakes, or grainy custards. Fortunately, many of these issues have simple fixes! For example, if your cookies spread too much, chilling the dough or adjusting oven temperature can help. The King Arthur Baking Company’s troubleshooting guide offers expert tips for rescuing failed bakes, from sunken cakes to over-whipped cream.
Final Thoughts: Start Your Dessert Journey Today
Embarking on your dessert journey is an exciting and rewarding endeavor. Whether you’re a beginner or an experienced baker, dessert recipes offer endless possibilities. With the right approach and mindset, you can create delectable treats to share with friends and family.
Start with Simple Dessert Recipes
If you’re just starting, focus on easy recipes that require minimal ingredients and preparation time. Begin with no-bake desserts or classic options like cookies and brownies. These recipes are forgiving and perfect for building your confidence. Transitioning to more complex desserts can come later, as your skills grow.
Embrace Mistakes as Learning Opportunities
Mistakes are inevitable, but they don’t have to be discouraging. Each misstep teaches you valuable lessons about technique and timing. For example, if your cake sinks in the middle, explore ways to improve batter consistency next time. By embracing each challenge, you’ll grow into a confident and skilled dessert creator.
Invest in Essential Kitchen Tools
Equipping your kitchen with the right tools makes preparing dessert recipes easier and more enjoyable. Start with basics like mixing bowls, measuring cups, and a whisk. As you progress, consider adding specialized tools like silicone molds or an electric mixer. With proper equipment, transitioning from prep to plating becomes seamless.
Experiment with Ingredients and Flavors
Exploring new ingredients and combinations keeps your dessert journey exciting. Try adding a twist to classic recipes by incorporating unique spices or alternative sweeteners. Experimenting not only enhances your skills but also ensures that your dessert recipes stand out.
Share Your Creations with Loved Ones
Homemade desserts bring people together and create cherished memories. Whether it’s a family dinner or a casual gathering, sharing your creations allows you to spread joy. Desserts are more than food—they’re a way to connect with others and celebrate special moments.
Take the First Step Today
Don’t wait to start your dessert journey. Choose a recipe that excites you, gather your ingredients, and get started. By practicing regularly and staying curious, you’ll soon discover your signature style. Remember, each recipe is an opportunity to create something amazing.
Conclusion:
In conclusion, mastering the art of desserts doesn’t have to be a daunting task. By following the tips outlined in this guide, you can confidently create delicious and impressive treats, even if you’re a beginner. From choosing simple ingredients to avoiding common mistakes, each step plays a crucial role in achieving sweet success.
Remember, practice makes perfect, so don’t be afraid to experiment and try new recipes. Whether you’re baking a cake, whipping up no-bake treats, or crafting a classic dessert, the key is to enjoy the process. With time, you’ll build your skills and gain confidence in the kitchen.
So, gather your ingredients, get creative, and start your dessert journey today! Sweet success is just around the corner.
Related Posts:
Onigiri Recipe: How to Make Perfect Japanese Rice Balls at Home